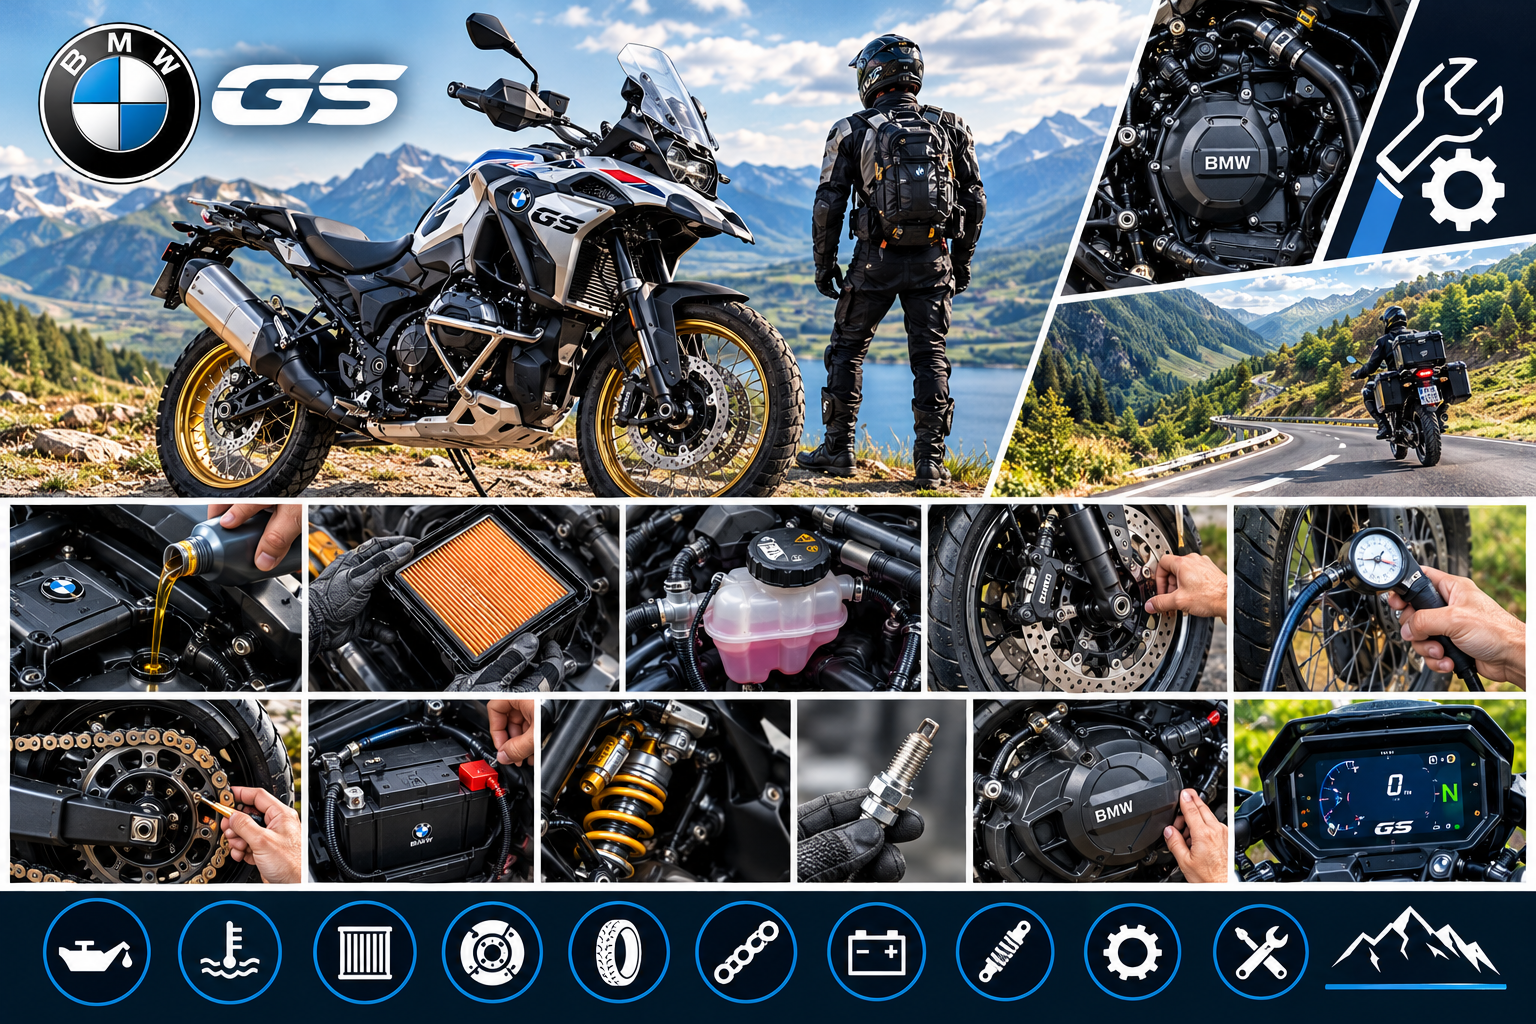
BMW GS Maintenance & Repair Guide: Essential Tips for Reliable Adventure Riding

file 000000006f04821192f38c10a59332e7

If you own a BMW GS, you already know that an adventure motorcycle needs more than regular oil changes. A GS may spend its life commuting on pavement, touring across highways, exploring gravel roads, or handling demanding off-road conditions. That combination makes proper maintenance especially important.

A well-maintained BMW GS can deliver strong performance, confident handling, and dependable long-distance riding. However, neglecting basic maintenance can gradually lead to poor performance, starting problems, unusual noises, brake issues, drivetrain wear, or expensive repairs.

This guide explains the most important BMW GS maintenance and repair areas that owners should understand. Whether you ride a GS for daily transportation, weekend adventures, or long-distance touring, these practical checks can help you keep the motorcycle reliable.

Why BMW GS Maintenance Matters

Adventure motorcycles are exposed to a wider range of conditions than many street motorcycles. A BMW GS may encounter rain, dust, mud, gravel, water crossings, extreme temperatures, heavy luggage, and long periods of high-speed highway riding.

These conditions can affect several systems at the same time.

Regular maintenance helps you identify problems before they become major failures. It also gives you an opportunity to inspect components that may not receive attention during a normal visual check.

Important areas include:

  • Engine and engine oil
  • Cooling system
  • Air intake and air filter
  • Fuel system
  • Battery and electrical components
  • Brakes
  • Tires and wheels
  • Suspension
  • Final drive
  • Clutch and transmission
  • Drive chain on applicable GS models
  • Controls and cables
  • Fasteners and protective components

Check the Engine Oil Regularly

Engine oil is one of the most important maintenance items on any BMW GS.

Oil lubricates internal engine components and helps control heat and wear. Long-distance riding, high engine temperatures, dusty environments, and heavy loads can make proper lubrication particularly important.

Always check the oil according to the procedure specified for your particular GS model. The motorcycle should be positioned correctly, and the engine should be at the appropriate temperature if the owner’s instructions require it.

Look for:

  • Low oil level
  • Oil leaks
  • Unusual oil consumption
  • Dark or contaminated oil
  • Oil around seals or engine covers

Do not simply add oil repeatedly without investigating why the level is dropping. A persistent low oil level can indicate a leak or excessive consumption that deserves further diagnosis.

Keep the Cooling System Healthy

Liquid-cooled BMW GS models depend on the cooling system to maintain the correct engine temperature.

Inspect the coolant reservoir and look for signs of leakage around hoses, connections, the radiator, and nearby components.

The radiator also deserves attention after off-road riding. Mud, insects, leaves, and dirt can reduce airflow through the radiator.

Never attempt to remove a hot cooling-system cap if your motorcycle uses a pressurized system. Allow the motorcycle to cool before performing inspections that could expose you to hot coolant or steam.

If the temperature rises unusually high or the cooling fan behaves abnormally, investigate the problem instead of continuing to ride normally.

Inspect the Air Filter After Dusty Riding

A BMW GS is designed for adventure riding, which means it can encounter dusty roads and trails.

A dirty air filter can restrict airflow into the engine. Severe contamination can affect throttle response, engine performance, and fuel economy.

Inspect the air filter according to your model’s service procedure, especially if you have recently ridden:

  • Gravel roads
  • Dusty trails
  • Construction areas
  • Dry off-road terrain
  • Areas with heavy airborne dirt

Do not assume the air filter is clean simply because the motorcycle is running normally. A filter can become progressively restricted before the rider notices an obvious performance problem.

Check the Battery and Electrical System

Adventure motorcycles often contain numerous electrical systems, including lighting, engine management, displays, sensors, ABS, charging components, and accessories.

A weak battery can create confusing symptoms.

Possible signs include:

  • Slow cranking
  • Intermittent starting
  • Electrical warnings
  • Flickering displays
  • Unusual electronic behavior
  • Accessories shutting down unexpectedly

Inspect the battery terminals for looseness or corrosion. If the motorcycle has been sitting unused for an extended period, check the battery condition before starting a long trip.

If the battery repeatedly loses charge, do not automatically replace it. The charging system should also be checked.

Inspect the Tires Before Every Adventure

Tires are critical on a heavy adventure motorcycle.

Check tire pressure when the tires are cold and follow the pressure recommendations for your specific motorcycle and riding conditions.

Also inspect the tires for:

  • Uneven wear
  • Cuts
  • Cracks
  • Embedded objects
  • Damaged sidewalls
  • Excessive wear
  • Abnormal tread patterns

Adventure riders sometimes reduce tire pressure for specific off-road conditions, but pressure should not be changed randomly. Follow the tire and motorcycle manufacturer’s recommendations for the intended riding situation.

Incorrect pressure can affect handling, tire temperature, braking, and stability.

Pay Attention to the Wheels and Spokes

Some BMW GS configurations use spoke wheels designed for demanding adventure use.

If your GS has spoke wheels, inspect the spokes periodically for damage or unusual looseness. A damaged wheel should not be ignored.

Also inspect the rims after hard off-road riding, particularly after hitting rocks, deep potholes, or other obstacles.

A wheel that develops damage can affect handling and tire sealing.

Maintain the Braking System

The braking system deserves special attention because a GS can carry a rider, passenger, luggage, and additional equipment.

Inspect the brake pads and pay attention to changes in braking feel.

Warning signs include:

  • Reduced braking performance
  • Unusual noises
  • Excessive lever travel
  • Vibration during braking
  • Brake fluid leakage
  • Uneven pad wear

Brake fluid should be maintained and replaced according to the manufacturer’s recommended service schedule.

If the brake lever suddenly feels significantly different, do not treat the problem as normal wear. Have the braking system inspected before continuing to ride.

Check the Final Drive

One of the areas that deserves particular attention on many BMW GS motorcycles is the final-drive system.

Depending on the specific GS model, the drivetrain design may differ, so always follow the maintenance procedure for your motorcycle.

Look for:

  • Oil leakage
  • Unusual play
  • Grinding or whining noises
  • Abnormal vibration
  • Damage around the final-drive housing

A final-drive problem can become expensive if ignored. Any unusual noise or movement should be investigated early.

Chain Maintenance on Applicable GS Models

Not every BMW GS uses a chain final drive, so this section applies only to models equipped with a chain.

A chain should be kept properly lubricated and adjusted according to the manufacturer’s specifications.

Check for:

  • Excessive slack
  • Tight spots
  • Rust
  • Damaged links
  • Worn sprocket teeth
  • Uneven chain movement

After riding through mud or water, clean and inspect the chain rather than allowing contaminated lubricant and dirt to remain on it.

Inspect the Suspension

A BMW GS is built to handle varying road surfaces, but its suspension still requires inspection.

Look for oil around fork tubes and shock components. Inspect the suspension after aggressive off-road riding or a hard impact.

Pay attention to changes in:

  • Ride height
  • Steering behavior
  • Rebound
  • Stability
  • Suspension noise

A motorcycle that suddenly feels unstable, excessively soft, or unusually harsh deserves a proper inspection.

Check for Loose Fasteners

Adventure riding can expose the motorcycle to vibration and repeated impacts.

During regular inspections, look for loose or damaged fasteners around components such as:

  • Hand guards
  • Skid plates
  • Luggage mounts
  • Mirrors
  • Exhaust components
  • Engine protection parts
  • Foot controls

Do not randomly tighten bolts without knowing the correct torque specification. Critical fasteners should be tightened according to the manufacturer’s service information.

Clean the Motorcycle After Off-Road Riding

Cleaning is not just about appearance.

Mud and dirt can hide leaks, damage, loose fasteners, and worn components. A dirty motorcycle can also retain moisture around sensitive areas.

After demanding off-road riding, clean the motorcycle carefully and inspect it as you go.

Pay particular attention to:

  • Wheels
  • Brake components
  • Radiator area
  • Engine protection
  • Suspension
  • Final drive
  • Chain on applicable models
  • Electrical connectors
  • Luggage mounts

Avoid directing high-pressure water directly at bearings, seals, electrical connectors, or other sensitive areas.

Watch for Warning Lights and Unusual Behavior

Modern BMW motorcycles use electronic systems to monitor many operating conditions.

A warning light should never be ignored simply because the motorcycle continues running.

If you notice a warning message, unusual engine behavior, poor starting, loss of power, or unexpected electronic behavior, determine the cause before continuing a long journey.

A diagnostic scan can sometimes help identify an electronic fault, but diagnostic equipment should be used alongside proper mechanical inspection rather than as a replacement for it.

Common BMW GS Problems That Should Not Be Ignored

Some symptoms deserve immediate attention.

Difficult Starting

Possible causes can include a weak battery, electrical problems, fuel-system issues, sensor faults, or other mechanical conditions.

Poor Engine Performance

Poor throttle response or reduced power may be related to air intake, fuel delivery, ignition, sensors, or maintenance condition.

Unusual Drivetrain Noise

New grinding, knocking, whining, or clicking sounds should be investigated, particularly if they change with vehicle speed or throttle position.

Excessive Vibration

Vibration can result from tires, wheels, drivetrain components, engine operation, loose hardware, or suspension-related problems.

Fluid Leaks

Any unexplained oil, coolant, brake fluid, or final-drive lubricant leak deserves attention.

Prepare Your BMW GS Before a Long Trip

A long-distance adventure should not begin with a quick glance at the fuel gauge.

Before a major trip, inspect the motorcycle systematically.

Check:

  1. Engine oil
  2. Coolant
  3. Brake condition
  4. Tire pressure
  5. Tire condition
  6. Battery
  7. Lights
  8. Drive system
  9. Suspension
  10. Luggage mounts
  11. Fasteners
  12. Tool kit and emergency equipment

If the motorcycle has recently received major service, give yourself enough time to confirm that everything is operating normally before leaving.

When You Should Stop Riding

Some problems should not be treated as minor maintenance issues.

Stop riding and investigate the motorcycle if you experience:

  • Severe loss of braking
  • Major fluid leakage
  • Sudden engine warning symptoms
  • Overheating
  • Severe drivetrain noise
  • Unstable steering
  • Damaged tire or wheel
  • Sudden loss of power
  • Serious electrical problems

Continuing to ride with a potentially dangerous mechanical problem can turn a manageable repair into a much larger problem—or create a safety hazard.Read also kawasaki-ninja-500-mileage-problems-guide

Final Thoughts

A BMW GS is capable of handling everything from everyday roads to serious adventure travel, but its reliability depends heavily on proper maintenance.

The best approach is not to wait for a major failure. Regularly inspect the engine, tires, brakes, cooling system, battery, suspension, drivetrain, and other critical components. Clean the motorcycle after difficult rides and pay attention to changes in sound, vibration, handling, or performance.

You do not need to be a professional mechanic to perform many basic inspections. However, complicated engine, electronic, braking, suspension, or drivetrain repairs should be handled with the correct service information and appropriate tools.

A properly maintained BMW GS is not only more reliable—it is also easier to trust when you are hundreds of miles away from home.
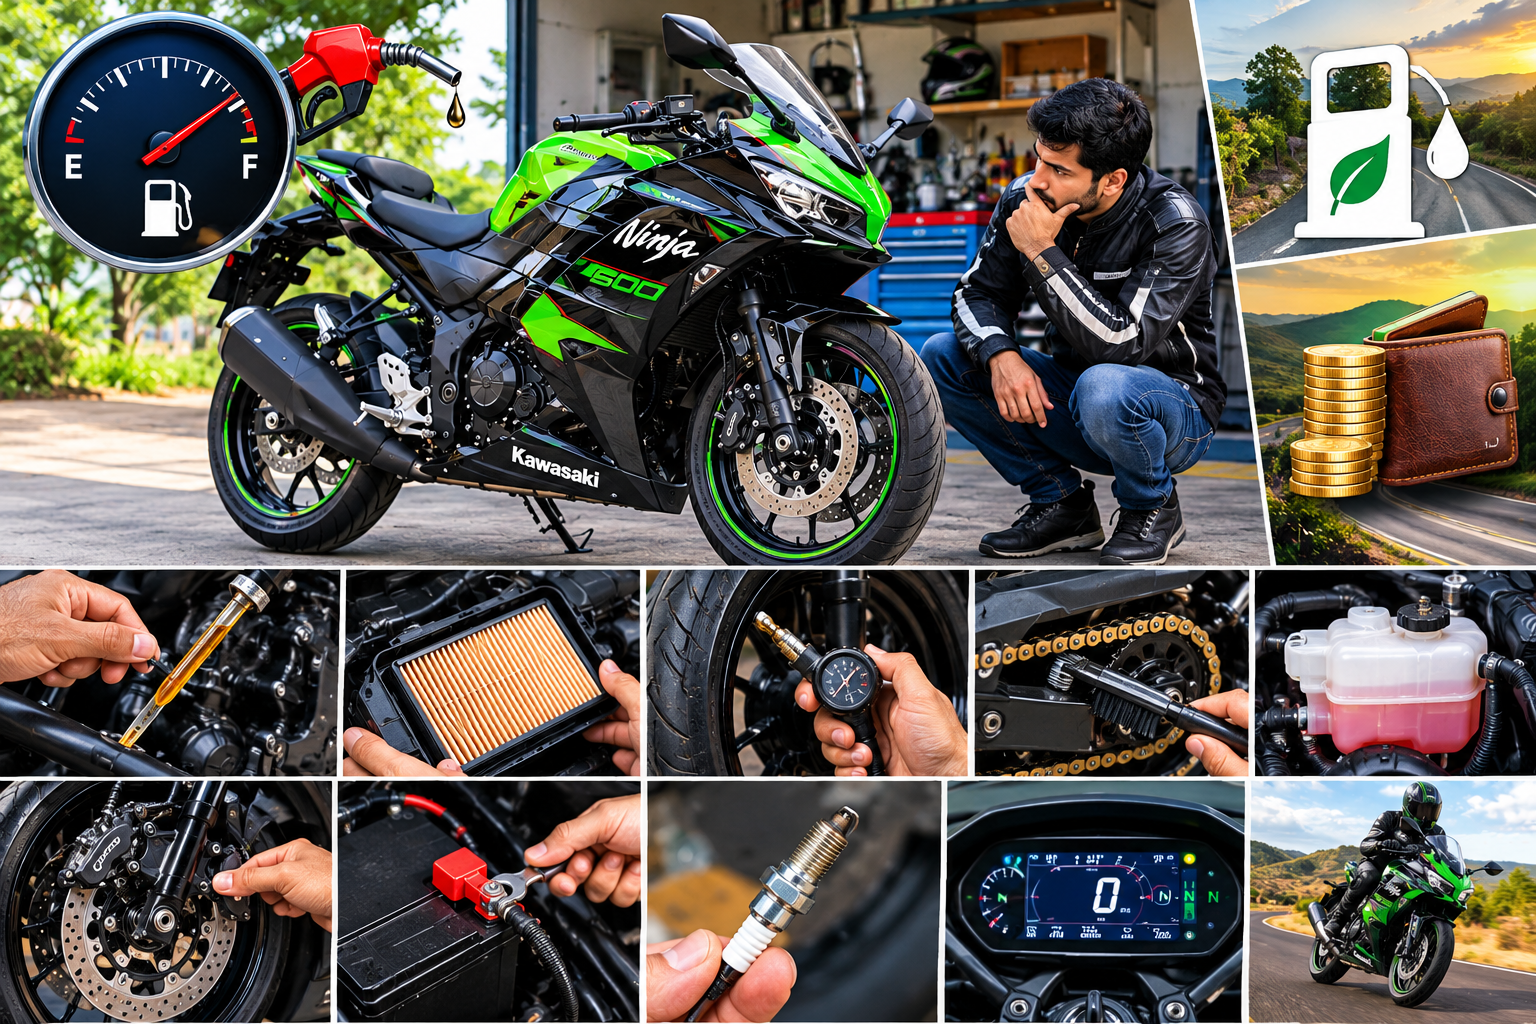
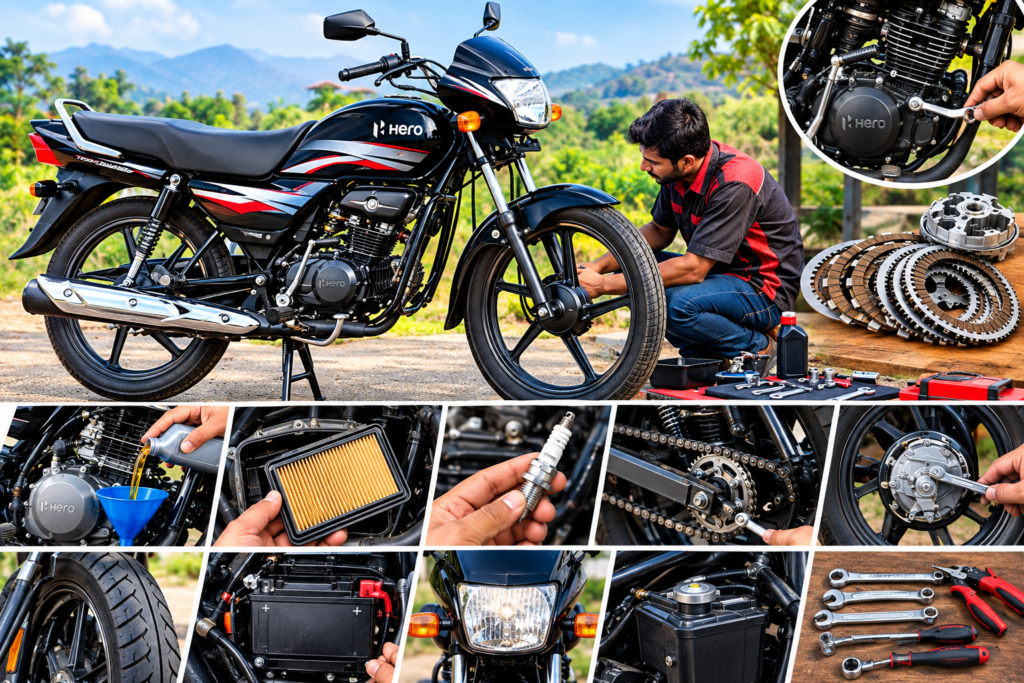
Kawasaki Ninja 500 Mileage Problems Guide: Causes, Diagnosis & Fixes

file 0000000012b48208b9a34d3ba96322dd

The Kawasaki Ninja 500 is designed to offer a balance between everyday usability and sportbike performance. Its 451cc liquid-cooled parallel-twin engine, fuel injection, six-speed transmission and relatively lightweight chassis make it capable of handling commuting, weekend rides and longer road trips.

However, fuel economy can vary significantly from one rider to another.

Some Ninja 500 owners may become concerned when their motorcycle uses more fuel than expected. In many cases, poor mileage does not automatically mean there is a major engine problem. Riding style, traffic, tire pressure, chain condition, maintenance, fuel-system condition and even weather can affect fuel consumption.

This guide explains the most common reasons a Kawasaki Ninja 500 may deliver disappointing fuel economy and how to systematically find the cause.

Understanding Ninja 500 Fuel Economy

Before diagnosing a mileage problem, it is important to understand that there is no single fuel-economy number that every Ninja 500 rider will achieve.

The motorcycle’s fuel consumption can change depending on:

  • City or highway riding
  • Average speed
  • Acceleration habits
  • Engine RPM
  • Rider weight
  • Passenger or luggage load
  • Tire pressure
  • Chain condition
  • Weather
  • Wind
  • Road elevation
  • Traffic
  • Engine temperature
  • Maintenance condition
  • Fuel quality

The current U.S.-market Ninja 500 has a 3.7-gallon fuel tank and includes an Economical Riding Indicator in its electronic rider information. Kawasaki lists the motorcycle with a 451cc parallel-twin engine, dual 32mm throttle bodies, six-speed transmission and sealed-chain final drive.

That combination gives the Ninja 500 a useful range for everyday riding, but the actual distance per tank depends heavily on how the motorcycle is operated.

What Counts as a Mileage Problem?

A sudden reduction in fuel economy is more concerning than simply getting different fuel economy from another rider.

For example, if your motorcycle has always consumed fuel at a certain rate and suddenly begins using considerably more fuel under similar riding conditions, it is worth investigating.

Possible warning signs include:

  • Fuel range suddenly decreases
  • Fuel consumption becomes inconsistent
  • Engine idle becomes rough
  • Throttle response changes
  • Starting becomes difficult
  • Engine runs unusually hot
  • Exhaust smell becomes unusually strong
  • Check-engine warning appears
  • Motorcycle feels slower than normal
  • Engine RPM behaves differently
  • Fuel consumption remains poor even during gentle riding

A small change from one tank to another does not necessarily indicate a mechanical fault.

Step 1: Calculate Your Actual Fuel Economy

Do not diagnose mileage problems by looking only at the fuel gauge.

The gauge is useful for estimating fuel level, but it is not a precise fuel-economy measurement.

A better method is to calculate your fuel economy over several tanks.

Basic Method

  1. Fill the tank consistently.
  2. Reset the trip odometer.
  3. Ride normally.
  4. Refill the tank.
  5. Record the amount of fuel added.
  6. Record the miles traveled.
  7. Calculate miles per gallon.

The basic formula is:

Miles ÷ Gallons Used = MPG

For example, if you ride 180 miles and use 3 gallons:

180 ÷ 3 = 60 MPG

Repeat the calculation over multiple tanks.

This reduces the effect of one unusual trip, such as heavy traffic or a long highway ride with strong headwinds.

Step 2: Check Your Riding Style

One of the biggest causes of poor motorcycle fuel economy is aggressive riding.

The Ninja 500 is a performance-oriented sport motorcycle. Its parallel-twin engine can provide strong acceleration, but repeatedly using high RPM and hard throttle openings will generally consume more fuel than smooth riding.

Frequent hard acceleration can reduce fuel economy quickly.

The following habits can increase fuel consumption:

  • Rapid acceleration from every stop
  • Frequent high-RPM riding
  • Heavy braking followed by hard acceleration
  • Staying in lower gears unnecessarily
  • Repeated high-speed highway riding
  • Riding aggressively through corners
  • Rapid changes between acceleration and braking

This does not mean you need to ride extremely slowly.

Instead, focus on smooth throttle control and selecting the appropriate gear.

Step 3: Avoid Unnecessary High RPM

Engine speed has a major influence on fuel consumption.

The Ninja 500’s engine is designed to rev, but operating at high RPM continuously is different from occasionally using the engine’s performance.

If you spend most of a ride near the upper end of the tachometer, your fuel consumption will generally be higher than during moderate-speed riding.

On the highway, choose a gear that allows the engine to operate comfortably without unnecessarily high RPM.

The six-speed transmission gives the rider flexibility to select an appropriate ratio for different road conditions.

Step 4: Check Tire Pressure

Incorrect tire pressure is an easy-to-overlook cause of reduced efficiency.

Underinflated tires can increase rolling resistance, which means the engine has to work harder to move the motorcycle.

Before checking pressure, allow the tires to cool and use the pressure recommended by Kawasaki for your specific motorcycle.

Do not use the maximum pressure molded into the tire sidewall as a substitute for the motorcycle manufacturer’s recommended setting.

While Checking Tires, Inspect For:

  • Uneven tread wear
  • Cuts
  • Cracks
  • Bulges
  • Embedded objects
  • Abnormal wear patterns

If one tire repeatedly loses pressure, investigate the cause.

A slow puncture, damaged valve or wheel problem can create both a safety issue and a fuel-economy problem.

Step 5: Inspect the Drive Chain

The Ninja 500 uses a sealed chain final drive.

The chain is responsible for transferring engine power to the rear wheel.

A poorly maintained chain can affect the efficiency and smoothness of power transfer.

Check for:

  • Excessive slack
  • Tight spots
  • Rust
  • Dry links
  • Damaged rollers
  • Abnormal wear
  • Poor lubrication
  • Sprocket tooth wear

A chain that is too tight can create unnecessary mechanical resistance and stress.

A chain that is too loose can create poor power transfer, noise and accelerated wear.

Always follow Kawasaki’s specified chain slack and maintenance procedure for your exact model year.

Step 6: Check the Air Filter

The engine needs a proper supply of clean air for combustion.

If the air filter becomes excessively dirty or restricted, airflow can be affected.

A restricted air intake can contribute to poor engine response and may affect fuel economy.

Do not automatically replace the air filter simply because it looks slightly dirty.

Follow the maintenance schedule and inspect it according to Kawasaki’s recommendations.

If the motorcycle is used frequently in dusty conditions, the air filter may require more attention.

Step 7: Consider Engine Temperature

The Ninja 500 uses a liquid-cooled engine.

The cooling system helps maintain the engine within its intended operating temperature range.

If the engine is not reaching normal operating temperature or is running excessively hot, fuel economy and engine behavior can be affected.

Potential cooling-system problems can include:

  • Low coolant
  • Cooling-system leaks
  • Radiator airflow restrictions
  • Thermostat problems
  • Cooling fan issues
  • Faulty temperature sensors

Never open a hot cooling system.

If you notice overheating, repeated coolant loss or unusual temperature behavior, have the motorcycle inspected.

Step 8: Look for Fuel-System Problems

The Ninja 500 uses Kawasaki’s Digital Fuel Injection system with dual 32mm throttle bodies.

The fuel-injection system controls fuel delivery according to engine operating conditions.

A fuel-system problem can potentially cause poor fuel economy.

Possible areas requiring diagnosis include:

  • Fuel injectors
  • Throttle bodies
  • Sensors
  • Fuel pressure
  • Electrical connections
  • Intake leaks
  • Engine-management faults

Do not replace injectors or sensors simply because fuel economy has decreased.

A proper diagnosis should determine whether the component is actually malfunctioning.

Step 9: Check for Intake Leaks

An intake leak can interfere with the air-fuel mixture and engine operation.

Inspect accessible intake connections for:

  • Loose clamps
  • Damaged hoses
  • Cracked rubber components
  • Disconnected lines
  • Poorly seated components

Possible symptoms of an intake problem can include:

  • Rough idle
  • Hesitation
  • Poor throttle response
  • Unusual idle speed
  • Poor fuel economy

If you suspect an intake leak, professional diagnosis may be necessary.

Step 10: Do Not Ignore the Check-Engine Light

A check-engine warning should never be ignored simply because the motorcycle still runs.

An engine-management fault can sometimes affect performance and fuel consumption.

The correct approach is to retrieve the relevant diagnostic information and investigate the underlying problem.

Do not assume that replacing the oxygen sensor, injector or another expensive component will automatically solve the issue.

A diagnostic code is a clue, not always a final diagnosis.

Step 11: Check the Brakes for Drag

A brake that does not release correctly can create resistance.

That resistance means the engine has to work harder to maintain speed.

Possible signs of brake drag include:

  • Motorcycle feels unusually difficult to push
  • One brake rotor becomes much hotter than expected
  • Motorcycle does not roll freely
  • Burning smell
  • Reduced acceleration
  • Abnormal brake-pad wear

Brake problems are safety-critical.

If you suspect a dragging brake, have it inspected rather than continuing to ride and hoping the problem disappears.

Step 12: Check Wheel and Bearing Condition

Wheel bearings allow the wheels to rotate smoothly.

A damaged bearing can create resistance, noise or abnormal wheel movement.

Possible warning signs include:

  • Grinding noise
  • Rough wheel rotation
  • Excessive play
  • Unusual vibration
  • Wheel-area noise

Wheel-bearing problems should not be ignored.

They are not simply fuel-economy issues; they can also become safety problems.

Step 13: Watch Your Highway Speed

Highway riding does not automatically produce excellent fuel economy.

At higher speeds, aerodynamic drag increases significantly.

A sportbike may feel comfortable at highway speeds, but increasing speed can increase the amount of power required to push the motorcycle through the air.

This means a rider traveling at a moderate highway speed may use less fuel than a rider traveling substantially faster, even when both motorcycles are mechanically identical.

Wind direction also matters.

A strong headwind can increase aerodynamic resistance and reduce fuel economy.

Step 14: Reduce Unnecessary Weight

Additional weight can affect fuel consumption.

Heavy luggage, accessories and carrying unnecessary equipment can increase the work required to accelerate the motorcycle.

This does not mean you should remove useful safety equipment.

Instead, avoid carrying unnecessary weight when it is not required.

For touring riders, pack intelligently and keep heavier items properly secured.

Step 15: Check Your Riding Environment

A motorcycle used primarily in stop-and-go traffic can consume fuel differently from one used on open roads.

City riding often involves:

  • Frequent stops
  • Frequent acceleration
  • Engine idling
  • Low-speed operation
  • Traffic congestion
  • Short trips

Short trips can also prevent the motorcycle from spending as much time operating under normal conditions.

If your Ninja 500 is used almost entirely in heavy urban traffic, lower fuel economy compared with a rider who spends more time on open roads may be completely normal.

Step 16: Avoid Excessive Idling

Letting the engine run while the motorcycle is stationary uses fuel without moving the motorcycle.

Long periods of unnecessary idling can therefore reduce fuel economy.

If you are stopped for an extended period and conditions allow, follow safe and appropriate practices rather than keeping the motorcycle running unnecessarily.

Never switch off the motorcycle in situations where doing so could create a traffic or safety problem.

Step 17: Use the Economical Riding Indicator

The Ninja 500 includes an Economical Riding Indicator.

This feature can help the rider understand when riding conditions are favorable for fuel-efficient operation.

It should be treated as a guide rather than a guarantee of a particular MPG figure.

The rider still controls:

  • Throttle input
  • Gear selection
  • Speed
  • Acceleration
  • Braking

Learning to ride smoothly is more important than constantly trying to chase an indicator.

Step 18: Check Fuel for Possible Problems

Always use fuel appropriate for the motorcycle and follow Kawasaki’s fuel recommendations.

If fuel economy suddenly changes after refueling, consider whether the difference could be related to fuel quantity, riding conditions or measurement method before assuming the fuel itself is defective.

If you repeatedly experience poor running, hesitation or starting problems after refueling, document the symptoms and have the motorcycle checked.

Step 19: Follow the Maintenance Schedule

Routine maintenance is one of the most important ways to protect fuel economy.

Maintenance should include the items specified in the owner’s manual for your particular model year.

Depending on the maintenance schedule, this can involve checking or servicing:

  • Engine oil
  • Oil filter
  • Air filter
  • Spark plugs
  • Drive chain
  • Coolant
  • Brakes
  • Tires
  • Battery
  • Throttle operation
  • Cables and controls

Do not assume that a motorcycle is properly maintained simply because it starts and runs.

Small problems can develop gradually before they become obvious.

Step 20: When Poor Mileage Could Indicate a Serious Problem

Poor fuel economy deserves more attention when it appears together with other symptoms.

Be especially cautious if you notice:

  • Strong fuel smell
  • Visible fuel leakage
  • Black or unusual exhaust smoke
  • Severe hesitation
  • Rough running
  • Repeated stalling
  • Overheating
  • Oil contamination
  • Coolant loss
  • Check-engine warning
  • Sudden major fuel-consumption increase

These symptoms can indicate a mechanical, fuel, ignition, cooling or electronic problem.

At that point, continuing to ride simply to test the mileage may not be the best decision.

A Simple Ninja 500 Mileage Troubleshooting Checklist

If your fuel economy seems worse than normal, work through the problem systematically.

First

Check how you calculated MPG.

Make sure the mileage and fuel quantity were recorded correctly.

Second

Think about recent riding conditions.

Ask yourself:

  • Have I been riding faster?
  • Has traffic become heavier?
  • Have I been using more high RPM?
  • Am I carrying additional weight?
  • Has the weather changed?
  • Have I been riding into strong wind?

Third

Inspect the easy mechanical items.

Check:

  • Tire pressure
  • Chain condition
  • Oil level
  • Coolant level
  • Air filter condition
  • Brake drag
  • Visible leaks

Fourth

Look for electronic or engine symptoms.

Check for:

  • Warning lights
  • Rough idle
  • Poor throttle response
  • Difficult starting
  • Unusual engine noise

Fifth

Get professional diagnosis when necessary.

If the problem remains after basic checks, avoid replacing expensive components based on guesses.

How to Improve Ninja 500 Fuel Economy

For most riders, the simplest improvements are riding and maintenance habits.

Ride Smoothly

Use progressive throttle input rather than repeatedly opening the throttle aggressively.

Select the Right Gear

Use the six-speed gearbox to keep the engine operating comfortably.

Maintain Correct Tire Pressure

Check pressure regularly with a reliable gauge.

Maintain the Chain

Keep the chain adjusted, lubricated and inspected according to Kawasaki’s recommendations.

Keep the Engine Properly Serviced

Follow the manufacturer’s maintenance schedule.

Avoid Unnecessary High-Speed Riding

Higher speed generally requires more aerodynamic power.

Remove Unnecessary Weight

Carry what you need rather than unnecessary luggageRead also hero-cd-dawn-bs4-repair-guide

Final Thoughts

A Kawasaki Ninja 500 that seems to have poor mileage does not necessarily have an engine problem.

Fuel economy is affected by many factors, and sportbike riders can see significant differences depending on riding style, speed, traffic, tire pressure, chain condition, maintenance and weather.

The best approach is to diagnose the situation instead of immediately replacing parts.

Start by calculating your actual MPG over several tanks. Then check riding conditions, tire pressure, chain condition, air filter, brakes and basic fluid levels. If the motorcycle also has rough running, fuel smell, overheating, warning lights or other unusual symptoms, move toward proper mechanical diagnosis.

The Ninja 500’s 451cc parallel-twin engine is designed to provide both usable everyday performance and sportbike character. Good maintenance and smooth riding can help you get the most practical fuel economy from that engine without sacrificing the reason many riders choose a Ninja in the first place.

Remember that fuel economy should be measured over time rather than judged from a single tank. If your mileage gradually changes, investigate the cause. If it suddenly drops dramatically or appears alongside mechanical symptoms, do not ignore it.

A systematic approach can help separate normal fuel-consumption variation from a genuine motorcycle problem—and that can save both fuel and unnecessary repair costs.

BS4 Hero CD Dawn Bike Repair Guide: Find Faults Before They Cause Breakdowns

file 0000000002ac821184b7bff8724cf48a8542971222977289789

A loose battery lead or worn tyre can turn a short ride into a roadside stop. This BS4 Hero CD Dawn bike repair guide helps you spot common faults early, avoid unnecessary part swaps, and keep unsafe problems off the road. It covers basic checks, not a replacement for a trained mechanic.

Repair steps and specifications can vary by model year and market version. Confirm your bike’s exact variant, then use its owner’s or service manual for part details, limits, and approved repair methods.

Confirm Your BS4 Hero CD Dawn Variant Before Repairs

The right part or adjustment depends on the exact motorcycle, not only its name or appearance. Check the bike’s identifying details before buying parts or starting work. A correct match also helps you use the right service instructions.

Check the model year, variant, and frame details

Compare the model year and variant on your registration papers with the details on the motorcycle. Frame and engine numbers can help confirm its identity; their locations may vary, so check the manual. If any details don’t match, ask a Hero dealer or qualified mechanic to verify the bike before ordering parts.

Gather tools and reference material

A basic tool set, suitable spanners, screwdrivers, pliers, a tyre-pressure gauge, clean cloths, and a torch can handle many visual checks. Use tools that fit well to avoid rounding fasteners. Keep the correct manual nearby for torque values, clearances, fluid types, tyre pressures, and adjustment limits. Don’t guess these figures.

Set up a safe repair area

Park on firm, level ground and support the motorcycle as the manual directs. Let the engine cool before inspecting parts near the exhaust or cylinder. Wear gloves when handling dirty parts and eye protection when debris or fluid could splash. Keep fuel away from flames, sparks, and other ignition sources.

Catch Wear and Maintenance Problems Early

A short inspection before a ride can reveal changes while they’re still easy to report or repair. Check the same areas each time, and note anything that looks or feels different. Don’t adjust a part if you’re unsure of the correct method.

Inspect engine oil and look for leaks

Check the oil using the method in the owner’s manual. The bike’s position, engine temperature, and time after shutdown can affect the reading, so follow the stated procedure. Look for fresh oil around the engine and on the ground beneath the motorcycle. A recurring leak needs diagnosis; topping up alone won’t fix its cause.

Check tyres, wheels, brakes, and controls

Inspect tyre tread and sidewalls for cuts, cracks, bulges, or embedded objects. Check pressure when the tyres are cold and compare it with the manual or tyre guidance for your bike. Look for visible wheel damage, then check that brake levers and pedals feel normal and the throttle moves and returns freely. Damaged tyres or unreliable brakes need prompt attention.

Clean and assess the drive chain

Look for rust, stiff or damaged links, unusual noise, and slack outside the range set in the manual. Clean and lubricate the chain using the method and product recommended for your model. Too much tension can strain parts, so don’t tighten the chain by eye. Seek help if links bind or the chain and sprockets show heavy wear.

Trace Starting and Running Problems Step by Step

Start with simple checks and record what happens before removing parts. A symptom can have several causes, so one clue rarely proves that a component has failed. If you can’t find a clear cause, stop before the repair grows beyond your skill or tools.

If the engine will not start, check basics first

Confirm there’s fuel in the tank, the ignition switch is in the correct position, and you’re using the starting method listed in the manual. Check for obvious loose connections only when the bike is off and safe to inspect. If the engine turns but won’t start, avoid repeated long attempts; they can drain the battery. Arrange a diagnosis if basic checks don’t help.

If the starter is weak or lights are dim

With the motorcycle off, inspect battery terminals for looseness, corrosion, or damaged wires. Don’t bridge terminals with a tool, and don’t disconnect the battery unless the manual explains the safe procedure. If the connections look sound but the starter remains weak or lights stay dim, request a battery and charging-system test.

If the engine runs poorly or stalls

Note whether the problem happens at idle, during acceleration, or after the engine warms up. Record whether it began after refuelling or recent service, and whether it happens every time. These details help a mechanic narrow the diagnosis, but they don’t identify a failed part on their own. Avoid changing several settings at once.

Handle Brakes, Chain, and Electrical Faults Without Guesswork

These systems affect safe control, so limit home repairs to checks you can perform correctly. Use the manual for model-specific procedures and limits. If a fault affects braking or returns after a basic check, leave diagnosis and repair to a qualified mechanic.

Investigate brake drag, noise, or weak stopping

Look for visible damage, unusual wear, fluid leaks, or a change in lever or pedal feel. Don’t ride the motorcycle to test brakes that feel weak, noisy, or inconsistent. A qualified mechanic should inspect the system before the bike returns to service. Avoid taking apart brake parts unless you have the right tools and training.

Correct chain problems within manual limits

Check chain condition first, then measure slack as the manual describes. Clean and lubricate it with a suitable product, and follow the model-specific method for any adjustment. Chain alignment and adjustment can vary by bike. If the chain or sprockets look badly worn, have a mechanic assess whether parts need replacement.

Check lights, horn, switches, and visible wiring

Test the lights, horn, and switches while the motorcycle is stationary. Inspect accessible bulbs, connectors, and wires for looseness, corrosion, or visible damage. Don’t fit a higher-rated fuse to stop one from blowing. A fuse that fails again, or an electrical fault that returns, needs proper diagnosis.

Verify the Repair and Know When to Call a Mechanic

Before you finish, make sure the bike is safe to inspect and all work matches the manual. Check the original symptom again without riding if it involves a safety-critical system. If the fault remains or a new one appears, stop and arrange professional help.

Recheck fasteners, fluid levels, and tool clearance

Look for loose parts, fresh leaks, trapped wires, and tools left near moving or hot components. Confirm fasteners and fluid levels using the correct service instructions. Don’t estimate torque by feel where the manual gives a value. If a part doesn’t fit as expected, pause rather than forcing it.

Confirm the fix while the motorcycle is stationary

With the bike stable, check that lights and the horn work, the throttle returns, and the brakes respond normally. Confirm any part you touched moves as intended and doesn’t rub or bind. If the original problem remains, or a new sound or warning appears, don’t ride until it’s checked.

Get help for safety-critical or complex faults

Brake failure, a fuel leak, repeated electrical faults, major engine noise, or damage to structural parts calls for professional service. Don’t ride a motorcycle with any of these problems. Tell the mechanic when the fault occurs and what checks you’ve completed; clear notes can help speed up diagnosisRead also yamaha-xsr-155-engine-specs-performance

Keep the BS4 Hero CD Dawn Ready for the Next Ride

Confirm the exact variant before buying parts or adjusting components. Use the manual for specifications, and check the tyres, brakes, chain, oil, and electrical functions on a regular schedule. Record symptoms instead of guessing at their cause, and keep the bike off the road when a safety-critical fault appears.

Small, methodical checks can make faults easier to trace, but a quick fix isn’t worth risking a breakdown or injury. Check your CD Dawn before the next ride, and book a mechanic when the repair is beyond your tools or training.

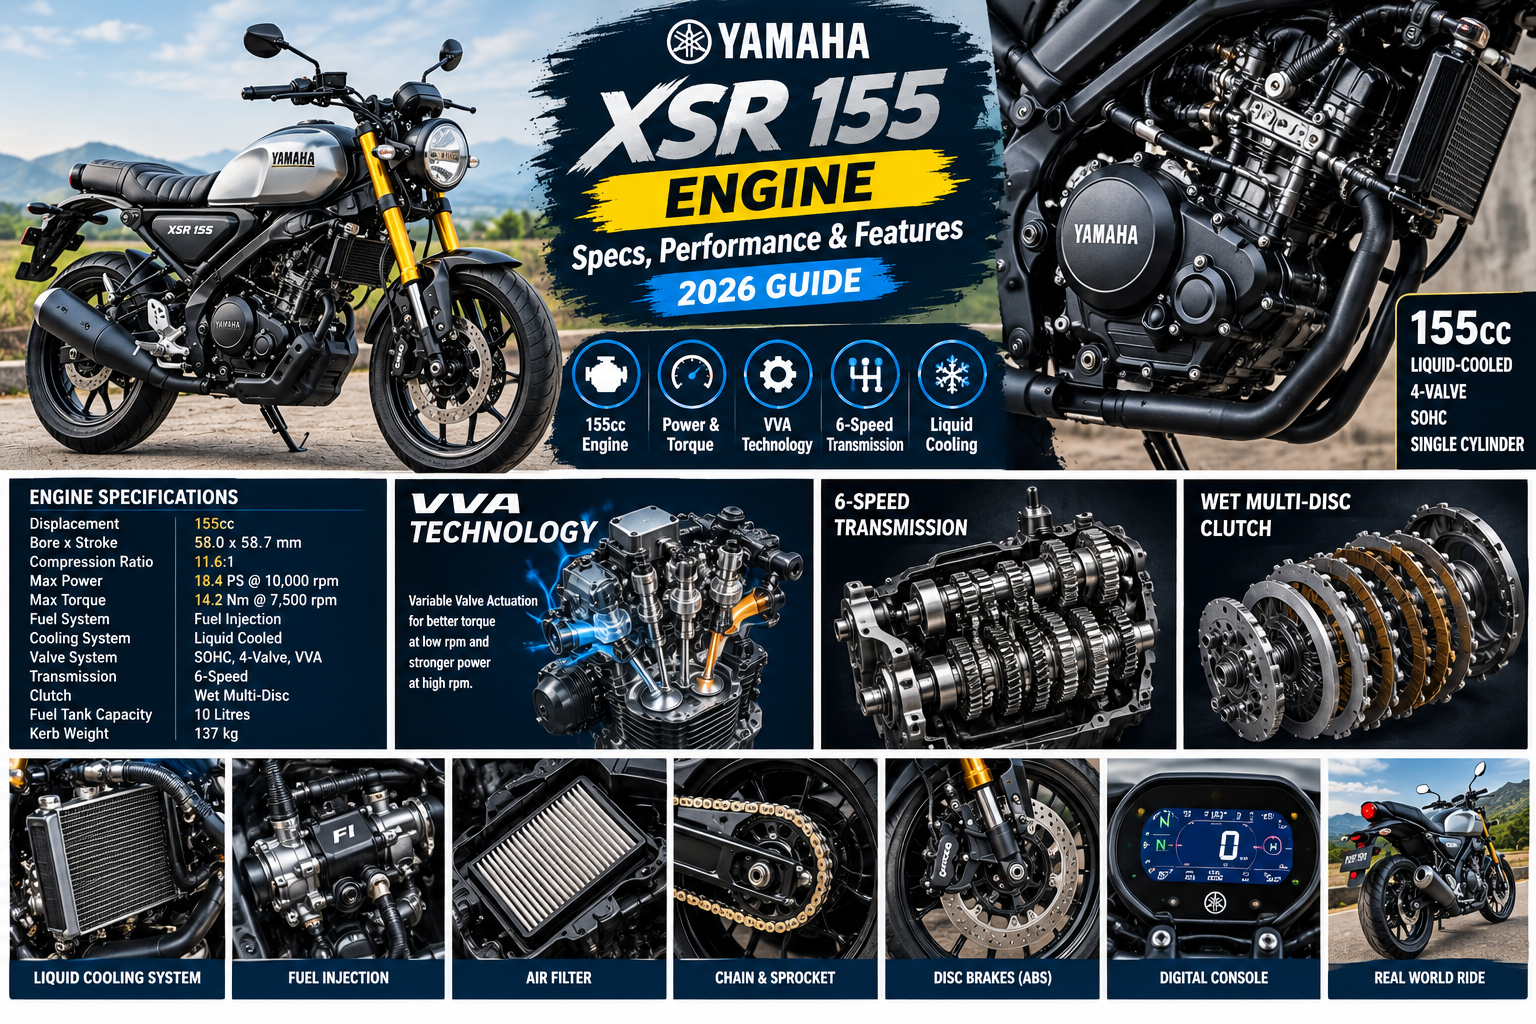
Yamaha XSR 155 Engine – Specs, Performance & Features (2026 Guide)

file 00000000997c82088333b74481554008

The Yamaha XSR 155 is a motorcycle that combines classic-inspired styling with modern engine technology. Its appearance may remind riders of traditional motorcycles, but underneath that retro design is a modern 155cc liquid-cooled engine designed for responsive performance and everyday usability.

The engine is one of the most important parts of the XSR 155. It uses a four-stroke, SOHC, four-valve, single-cylinder layout with electronic fuel injection and Variable Valve Actuation (VVA).

Yamaha lists a claimed maximum output of 18.4 PS at 10,000 rpm and maximum torque of 14.2 Nm at 7,500 rpm. The engine is paired with a six-speed transmission and wet multi-disc clutch.

This guide explains the XSR 155 engine in simple technical terms, including its specifications, VVA technology, cooling system, fuel injection, transmission, performance characteristics and important maintenance considerations.

Yamaha XSR 155 Engine Specifications

The main engine specifications include:

  • Engine type: Liquid-cooled, four-stroke, SOHC, four-valve
  • Cylinder configuration: Single cylinder
  • Displacement: 155cc
  • Bore: 58.0 mm
  • Stroke: 58.7 mm
  • Compression ratio: 11.6:1
  • Maximum power: 18.4 PS at 10,000 rpm
  • Maximum torque: 14.2 Nm at 7,500 rpm
  • Fuel system: Electronic fuel injection
  • Valve technology: VVA
  • Starting system: Electric starter
  • Transmission: Six-speed
  • Clutch: Wet multi-disc
  • Fuel tank capacity: 10 litres
  • Kerb weight: 137 kg

The current Yamaha India specification also lists the XSR 155 as E20 compatible.

What Type of Engine Does the XSR 155 Use?

The XSR 155 uses a liquid-cooled, four-stroke, single-cylinder engine with a single overhead camshaft and four valves.

This combination is designed to provide a balance between compact engine dimensions, good breathing capability and performance at higher engine speeds.

The four-valve cylinder head is particularly useful when the engine needs to move a larger volume of air at higher rpm.

Instead of using a basic commuter-style engine configuration, Yamaha has equipped the XSR 155 with technology intended to provide a wider performance range.

Understanding the 155cc Displacement

Engine displacement refers to the total volume swept by the piston inside the cylinder.

The XSR 155 has a displacement of 155cc, with a bore of 58.0 mm and a stroke of 58.7 mm.

These dimensions create a relatively compact engine package while allowing the engine to operate effectively across a broad rpm range.

A 155cc engine does not automatically tell us how fast a motorcycle will accelerate or what its top speed will be.

Engine output, gearing, motorcycle weight, aerodynamics, tyres, rider weight and road conditions all influence real-world performance.

Yamaha XSR 155 VVA Technology

One of the most interesting features of the XSR 155 engine is Yamaha’s Variable Valve Actuation, commonly called VVA.

VVA is designed to change valve operation characteristics according to engine speed.

A motorcycle engine needs different valve characteristics at different rpm ranges.

At lower engine speeds, the engine benefits from characteristics that support useful torque and smooth operation.

At higher engine speeds, the engine needs to breathe effectively to continue producing power.

VVA helps address this difference by using different valve-control characteristics across the engine’s operating range.

For the rider, this means the engine can provide useful response at normal speeds while still having a stronger high-rpm character.

Why VVA Matters During Riding

The XSR 155 produces its maximum power at 10,000 rpm.

That means the engine is designed to continue producing useful performance as the rpm rises.

When riding slowly through traffic, the engine does not need to be constantly operated at high rpm.

However, when stronger acceleration is required, selecting the appropriate gear and allowing the engine to rev can make a noticeable difference.

This is one reason why understanding the engine’s power characteristics is more useful than simply looking at the displacement number.

Maximum Power and Torque

The XSR 155 produces a claimed:

18.4 PS at 10,000 rpm

and

14.2 Nm at 7,500 rpm.

The torque figure tells us about the engine’s ability to produce rotational force, while the power figure reflects how effectively that force is delivered as engine speed increases.

For everyday riding, torque helps the motorcycle respond when accelerating from lower and medium speeds.

At higher rpm, the engine’s power output becomes increasingly important.

This gives the XSR 155 a more performance-oriented character than a motorcycle designed purely around low-speed commuting.

Liquid Cooling System

The XSR 155 uses liquid cooling.

In a liquid-cooled engine, coolant circulates through passages around the engine to absorb heat.

The heated coolant then travels to the radiator, where heat is transferred to the surrounding air.

After cooling, the coolant returns to the engine and continues the cycle.

This system helps maintain a controlled engine operating temperature, particularly when the motorcycle is being ridden in traffic, under load or at higher rpm.

Why Engine Temperature Matters

An engine that becomes excessively hot can experience increased wear and reduced performance.

Proper coolant level, radiator condition and correct maintenance are therefore important.

Riders should never open a hot radiator or pressurized cooling-system component.

Always allow the engine to cool before inspecting the cooling system.

Four-Valve Cylinder Head

The XSR 155 uses four valves in its cylinder head.

A four-valve configuration generally allows efficient intake and exhaust gas flow through the cylinder head.

Two intake valves and two exhaust valves provide a useful valve area while allowing the engine to remain compact.

The four-valve head works together with fuel injection, VVA and the liquid-cooling system to support the engine’s performance characteristics.

Electronic Fuel Injection

The XSR 155 uses electronic fuel injection instead of a traditional carburetor.

Fuel injection allows the engine management system to control fuel delivery electronically.

This helps provide consistent fuel delivery under different operating conditions.

It also supports easier starting and predictable throttle response when the engine is properly maintained.

For owners, keeping the air filter, fuel system and electrical connections in good condition is important.

If the motorcycle develops poor starting, unstable idle or unusual throttle response, replacing parts randomly is not the correct approach.

The fuel, ignition, air intake and sensor systems should be diagnosed systematically.

Six-Speed Transmission

The XSR 155 uses a six-speed manual transmission.

Having six gears gives the rider more flexibility in keeping the engine within a useful rpm range.

Lower gears are useful for:

  • Starting from a stop
  • Slow traffic
  • Climbing
  • Strong acceleration

Higher gears are useful for:

  • Open roads
  • Steady cruising
  • Maintaining speed with suitable engine rpm

Good gear selection can make the engine feel smoother and more responsive.

Wet Multi-Disc Clutch

The XSR 155 uses a wet multi-disc clutch.

A wet clutch operates with lubrication around the clutch assembly and uses multiple friction plates to transfer engine power to the gearbox.

The clutch plays an important role when starting, changing gears and controlling the motorcycle at low speeds.

Proper clutch adjustment and correct riding technique can help reduce unnecessary clutch wear.

Avoid keeping the clutch partially engaged for long periods, especially in heavy traffic.

XSR 155 Engine Performance in City Riding

The XSR 155’s engine can be used effectively in everyday urban riding when the rider selects appropriate gears.

In slow traffic, smooth throttle control is more important than constantly using high rpm.

The six-speed gearbox gives the rider enough flexibility to select a suitable gear as speed changes.

Because the engine produces peak torque at 7,500 rpm, riders should not expect every gear to provide identical acceleration at every engine speed.

Selecting the right gear is part of using the engine correctly.

Performance on Open Roads

On open roads, the XSR 155 engine’s higher-rpm character becomes more noticeable.

Its maximum power is produced at 10,000 rpm, so the engine has a relatively high operating range for a 155cc motorcycle.

When overtaking, selecting an appropriate lower gear can allow the engine to move into a stronger part of its power range.

However, real-world acceleration depends on many factors.

These include:

  • Rider weight
  • Passenger load
  • Wind
  • Road gradient
  • Tyre condition
  • Motorcycle maintenance
  • Fuel quality
  • Gear selection
  • Riding position

Therefore, a claimed power figure should not be treated as a guarantee of a particular acceleration or top-speed result.

Fuel Efficiency and Riding Style

Fuel economy is not a fixed number.

The same motorcycle can deliver different fuel consumption depending on how it is ridden.

Aggressive acceleration, frequent high-rpm riding, heavy traffic, low tyre pressure and additional load can increase fuel consumption.

A smoother riding style, correct gear selection and proper motorcycle maintenance can help improve efficiency.

The XSR 155’s 10-litre fuel tank provides useful capacity for everyday riding, but actual riding range depends on real-world fuel consumption.

Engine Maintenance Basics

A modern 155cc performance-oriented engine should be maintained according to the manufacturer’s service schedule.

Engine Oil

Use the engine oil grade and specification recommended for the motorcycle.

Do not choose oil only because another motorcycle uses the same viscosity.

Correct oil helps lubricate internal engine components and supports proper operation of the clutch and gearbox.

Air Filter

The engine requires clean air for proper combustion.

A dirty or restricted air filter can affect airflow and engine response.

Inspect and replace the filter according to the recommended maintenance schedule.

Coolant

Because the XSR 155 is liquid cooled, coolant condition is important.

Check the coolant level using the correct procedure.

Never open a hot cooling system.

Drive Chain

The engine’s power reaches the rear wheel through the chain drive.

A chain that is too loose, too tight, dry or heavily worn can reduce smoothness and increase component wear.

Inspect chain condition and maintain lubrication and adjustment according to the manufacturer’s recommendations.

Engine Warm-Up

Modern fuel-injected engines do not need long periods of stationary idling before every ride.

After starting the motorcycle, allow the engine to settle and then ride smoothly while it reaches normal operating temperature.

Avoid immediately demanding maximum engine performance from a completely cold engine.

Gradual operation helps the engine reach normal temperature under controlled conditions.

Common Symptoms That Need Attention

Riders should not ignore changes in engine behavior.

Possible warning signs include:

  • Difficult starting
  • Repeated stalling
  • Unstable idle
  • Excessive engine noise
  • Poor throttle response
  • Unusual smoke
  • Engine overheating
  • Coolant loss
  • Oil leakage
  • Unusual vibration
  • Check-engine warning

A single symptom does not automatically identify the failed component.

For example, poor starting can involve fuel delivery, ignition, battery condition, sensors or other systems.

Proper diagnosis is better than replacing parts based only on symptoms.

How to Keep the XSR 155 Engine Healthy

A few basic habits can help maintain the engine:

  1. Follow the recommended service schedule.
  2. Use the correct engine oil.
  3. Check fluid levels regularly.
  4. Keep the air filter clean.
  5. Maintain the drive chain correctly.
  6. Monitor coolant level.
  7. Keep the radiator area clean.
  8. Avoid unnecessary high-rpm operation when the engine is cold.
  9. Do not ignore warning lights.
  10. Repair oil or coolant leaks promptly.
  11. Maintain correct tyre pressure.
  12. Use genuine or manufacturer-approved replacement parts where appropriate.

XSR 155 Engine and Motorcycle Weight

The engine’s performance is also influenced by the motorcycle’s overall weight.

Yamaha lists the XSR 155 at 137 kg kerb weight, including oil and a full fuel tank.

A relatively manageable motorcycle weight can help the engine’s available power feel more useful during acceleration and everyday riding.

The actual riding experience still depends on rider weight, road conditions and riding technique.

Engine and Chassis Working Together

A motorcycle engine cannot be judged independently from the rest of the machine.

The XSR 155 uses a Deltabox frame along with an upside-down front fork and link-type rear suspension.

It also uses disc brakes at both ends and dual-channel ABS.

The front tyre is specified as 100/80-17 and the rear as 140/70R-17 radial tubeless.

These components help the motorcycle make practical use of the engine’s performance.

Electronic Features Supporting the Engine

The XSR 155 also includes several modern electronic features.

Depending on the specification, Yamaha lists features such as:

  • VVA
  • Traction control
  • Y-Connect smartphone connectivity
  • Digital instrumentation
  • Fuel-consumption information
  • Digital tachometer
  • Digital fuel gauge
  • LED lighting
  • Dual-channel ABS

Traction control can help reduce excessive rear-wheel spin in certain low-grip situations.

However, electronic rider aids cannot replace good tyres, appropriate speed and careful throttle control.

Is the XSR 155 Engine Suitable for Beginners?

The answer depends on the rider’s experience and riding habits.

The motorcycle has a manageable 155cc displacement, but its performance-oriented engine characteristics mean that beginners should learn smooth throttle control, braking and gear selection before trying to use its full performance.

A new rider should concentrate on:

  • Smooth clutch release
  • Correct gear selection
  • Controlled acceleration
  • Proper braking
  • Safe cornering
  • Understanding road conditions

Learning these skills is more important than trying to reach maximum rpm.Read also diy-car-repair-guide-for-beginners

Final Thoughts

The Yamaha XSR 155 engine is a modern 155cc powerplant that combines liquid cooling, four-valve technology, electronic fuel injection and VVA.

Its claimed 18.4 PS output at 10,000 rpm and 14.2 Nm torque at 7,500 rpm give the engine a performance-oriented character, while the six-speed transmission allows the rider to use that performance across a broad range of speeds.

The real strength of the engine is not one specification alone.

The combination of VVA, fuel injection, liquid cooling, four valves, six-speed gearing and a wet multi-disc clutch creates a package designed for both everyday riding and more enthusiastic use.

For long-term reliability, regular maintenance remains essential. Correct engine oil, clean air filtration, proper coolant level, good chain maintenance and timely servicing can help the engine continue performing properly.

The XSR 155 is therefore interesting not simply because of its retro appearance, but because modern engine technology sits underneath that classic-inspired design.

For riders who enjoy understanding how their motorcycle works, the XSR 155 provides a good example of how a compact engine can combine everyday usability with modern performance technology.

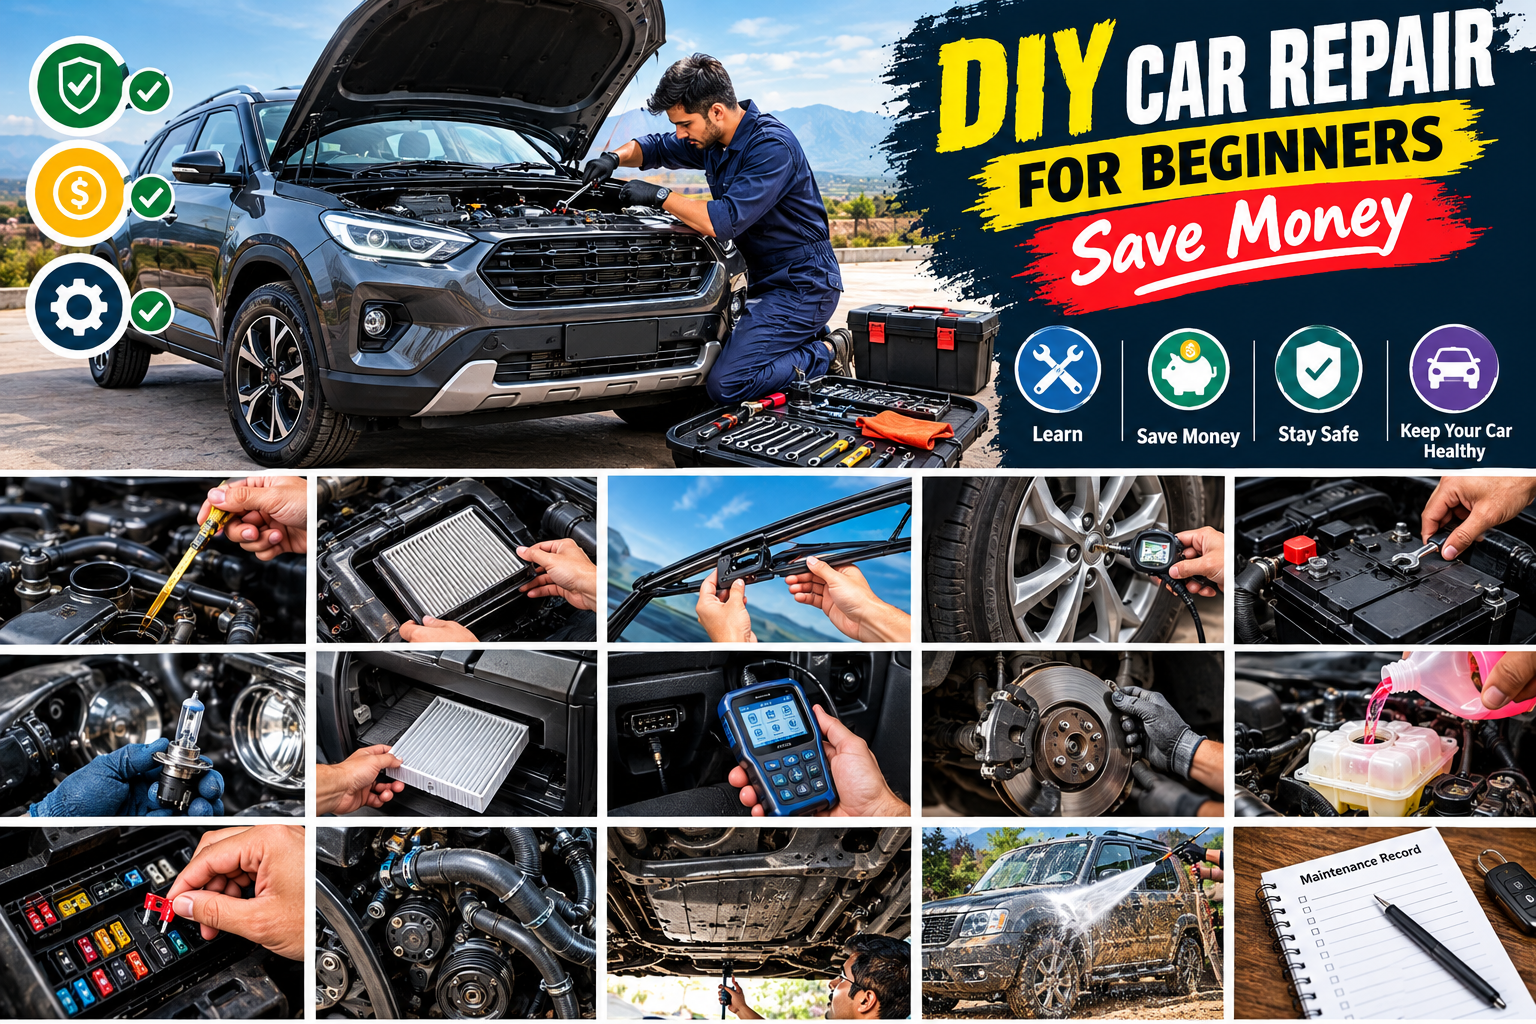
Step-by-Step DIY Car Repair Guide for Beginners (Save Money)

file 000000007f108211aae00887d066f3fa

Basic car repairs do not always require an expensive workshop visit. Many simple maintenance and repair jobs can be performed at home if you have the right tools, follow the correct procedure, and understand your vehicle.

For beginners, the most important thing is not to start with complicated engine or transmission repairs. Start with simple jobs such as checking fluids, replacing wiper blades, changing air filters, inspecting the battery, checking tyre pressure, and replacing certain bulbs.

Learning these basic skills can help you understand your car better, identify problems earlier, and potentially save money on routine maintenance.

This guide explains several beginner-friendly DIY car repair and maintenance tasks step by step.

Why Learn Basic DIY Car Repair?

Modern cars contain many electronic and mechanical systems, but not every maintenance job requires professional equipment.

Learning basic car care can help you:

  • Understand common vehicle problems
  • Perform simple maintenance at home
  • Reduce unnecessary workshop visits
  • Recognize problems before they become expensive
  • Keep important components in better condition
  • Save time on simple repairs
  • Become more confident when dealing with your vehicle

However, DIY repair should always be approached carefully. If a repair involves airbags, fuel systems, high-voltage hybrid or EV components, major suspension components, or internal engine work, professional service may be the safer choice.

Basic Tools Every Beginner Should Have

Before starting DIY car repairs, build a small collection of quality tools.

Useful beginner tools include:

  • Socket and ratchet set
  • Combination wrench set
  • Screwdriver set
  • Pliers
  • Needle-nose pliers
  • Torque wrench
  • Jack
  • Jack stands
  • Wheel chocks
  • Tyre pressure gauge
  • Flashlight or inspection light
  • Work gloves
  • Safety glasses
  • Funnel
  • Oil drain pan
  • OBD-II scanner for compatible vehicles

Do not rely on the vehicle jack alone when working underneath a car. A proper jack stand or suitable professional lifting equipment is essential for work that requires the vehicle to remain raised.

Step 1: Learn How to Safely Prepare the Car

Safety should always come before saving money.

Park the vehicle on a firm, level surface whenever possible. Engage the parking brake and switch off the engine.

If you are working near the wheels, use wheel chocks to help prevent unwanted movement.

Allow hot components such as the engine, exhaust and cooling system to cool before working around them.

Before starting any repair, read the vehicle owner’s manual. Different vehicles can use different fluids, fasteners, procedures and specifications.

Never work underneath a vehicle supported only by a hydraulic jack.

Step 2: Check the Engine Oil

Checking engine oil is one of the easiest maintenance tasks for beginners.

How to Check Engine Oil

  1. Park the vehicle on level ground.
  2. Turn off the engine.
  3. Allow the vehicle to sit for the period recommended by the manufacturer.
  4. Open the hood and locate the engine oil dipstick if your vehicle has one.
  5. Remove the dipstick.
  6. Wipe it clean with a lint-free cloth.
  7. Insert it completely again.
  8. Remove it and check the oil level.
  9. Make sure the level is within the manufacturer’s marked range.

If the oil level is low, add the correct oil specification recommended for your engine.

Do not simply choose oil based on viscosity alone. Modern engines may require specific oil standards or manufacturer approvals.

Also avoid overfilling the engine.

Why Oil Level Matters

Engine oil lubricates moving components and helps control heat and wear. Running with insufficient oil can cause serious engine damage.

If you repeatedly notice that the oil level drops quickly, investigate the reason instead of simply adding oil again and again.

Step 3: Replace the Engine Air Filter

A dirty air filter can restrict airflow to the engine.

Replacing an air filter is often one of the simplest beginner maintenance jobs.

Step-by-Step Procedure

  1. Switch off the engine.
  2. Open the hood.
  3. Locate the air filter housing.
  4. Release the clips or remove the fasteners.
  5. Open the housing carefully.
  6. Remove the old filter.
  7. Clean loose debris from the housing without allowing dirt to enter the intake.
  8. Compare the replacement filter with the old one.
  9. Install the new filter in the correct orientation.
  10. Close and secure the housing properly.

Do not operate the engine with the air intake system improperly assembled.

A filter that is not seated correctly can allow unfiltered air and dirt into the engine.

Step 4: Check and Replace Windshield Wipers

Wiper blades are simple components, but they are extremely important for visibility.

Inspect them if they leave:

  • Streaks
  • Unwiped areas
  • Water smears
  • Chattering sounds
  • Cracked rubber

How to Replace Wiper Blades

  1. Lift the wiper arm carefully.
  2. Locate the locking mechanism.
  3. Release the old blade.
  4. Compare the replacement blade with the old one.
  5. Attach the new blade securely.
  6. Gently lower the arm onto the windshield.

Do not allow a bare metal wiper arm to fall against the glass because it can damage the windshield.

Step 5: Check Tyre Pressure

Incorrect tyre pressure can affect handling, braking, tyre wear and fuel economy.

Check tyre pressure when the tyres are cold and use the pressure specified by the vehicle manufacturer.

The correct pressure can usually be found on the vehicle’s tyre-information placard or in the owner’s manual.

Basic Tyre Inspection

While checking pressure, look for:

  • Uneven tread wear
  • Cuts
  • Cracks
  • Bulges
  • Embedded objects
  • Excessively worn tread

Do not depend only on visual inspection to determine tyre pressure.

If a tyre repeatedly loses pressure, find the cause. It could be a puncture, damaged valve, wheel problem or another issue.

Step 6: Inspect the Battery

A car battery is another component that beginners can inspect without complicated equipment.

Look for:

  • Loose battery terminals
  • Corrosion
  • Damaged cables
  • Swollen battery casing
  • Leakage
  • Poor connections

Before disconnecting a battery, check the owner’s manual because some vehicles have special battery-management procedures.

Never allow tools to create a short circuit between battery terminals.

If the battery repeatedly goes flat, replacing it immediately may not solve the real problem. A charging-system or electrical fault could be responsible.

Step 7: Replace a Simple Vehicle Bulb

Some vehicles allow owners to replace certain exterior or interior bulbs easily, although modern cars may use sealed LED assemblies.

General Procedure

  1. Turn off the vehicle and lights.
  2. Identify the bulb or access cover.
  3. Remove the cover if necessary.
  4. Disconnect the electrical connector.
  5. Remove the old bulb.
  6. Install the correct replacement.
  7. Reconnect the wiring.
  8. Test the light before closing everything.

Never force a bulb into the wrong socket.

For LED assemblies or complicated lighting systems, follow the manufacturer’s procedure rather than trying to disassemble sealed components.

Step 8: Replace the Cabin Air Filter

The cabin air filter helps clean the air entering the passenger compartment.

Depending on the vehicle, it may be located behind the glove box or in another HVAC-access area.

Basic Replacement Procedure

  1. Open the access panel or glove box.
  2. Locate the filter housing.
  3. Remove the cover.
  4. Pull out the old filter.
  5. Check the airflow-direction marking.
  6. Install the new filter in the correct direction.
  7. Reinstall the cover and access panel.

A heavily dirty cabin filter can reduce airflow from the vents.

Step 9: Learn Basic OBD-II Diagnostics

An OBD-II scanner can help beginners understand why the check-engine light is illuminated on compatible vehicles.

The scanner connects to the vehicle’s diagnostic port and may display diagnostic trouble codes.

However, a trouble code is not automatically a confirmation that a particular component needs replacement.

For example, a sensor-related code may sometimes be caused by wiring, connectors, air leaks or another underlying problem.

Basic Diagnostic Process

  1. Park the vehicle safely.
  2. Locate the diagnostic connector.
  3. Connect the compatible scanner.
  4. Follow the scanner instructions.
  5. Record any stored codes.
  6. Research the code using reliable repair information.
  7. Inspect the relevant system.
  8. Repair the actual cause.
  9. Clear codes only when appropriate.
  10. Test the vehicle and confirm whether the problem returns.

Avoid replacing expensive parts simply because a code mentions that component.

Step 10: Learn How to Inspect Brake Components

Brake maintenance is extremely important, but beginners should understand their limits.

You may be able to visually inspect brake components through the wheel or during a wheel removal procedure if you have the correct equipment and experience.

Look for obvious signs such as:

  • Extremely thin brake pads
  • Damaged brake components
  • Fluid leakage
  • Uneven wear
  • Unusual rotor condition

If the brake pedal feels soft, braking performance changes significantly, brake fluid is leaking, or you are unsure about the condition of the braking system, professional inspection is appropriate.

Brakes are not an area where beginners should take unnecessary risks.

Step 11: Check Engine Coolant

Never open a hot cooling-system cap.

A cooling system can remain pressurized after the engine is switched off, and hot coolant can cause severe burns.

After the engine has completely cooled, inspect the coolant reservoir and compare the level with the markings.

Use only the coolant type and specification recommended for the vehicle.

If coolant repeatedly disappears, do not treat it as normal. Look for leaks or have the cooling system professionally inspected.

Step 12: Replace a Fuse

A blown fuse can sometimes cause an electrical accessory to stop working.

The owner’s manual normally identifies fuse locations and circuits.

Basic Fuse Replacement

  1. Switch off the vehicle.
  2. Locate the appropriate fuse box.
  3. Identify the affected circuit.
  4. Remove the suspected fuse.
  5. Inspect it carefully.
  6. Replace it only with the correct type and rating.
  7. Test the affected system.

Never install a higher-rated fuse to prevent it from blowing again.

A fuse protects an electrical circuit. If the replacement fuse blows again, there may be an electrical fault that requires diagnosis.

Step 13: Inspect Belts and Hoses

With the engine switched off and cool, visually inspect accessible belts and hoses.

Look for:

  • Cracks
  • Fraying
  • Severe wear
  • Bulges
  • Leaks
  • Loose connections

Do not place your hands near moving belts while the engine is running.

If a belt shows significant damage, have it replaced before failure causes additional problems.

Step 14: Learn How to Find Fluid Leaks

Fluid leaks can provide useful clues about vehicle problems.

When the vehicle is parked safely, look for fresh fluid underneath it.

Different fluids can have different colors, smells and locations, but color alone should not be used to identify a fluid with certainty.

If you find a leak, first determine which system is affected.

Possible sources include:

  • Engine oil
  • Coolant
  • Transmission fluid
  • Brake fluid
  • Power steering fluid on vehicles equipped with hydraulic systems
  • Washer fluid

Brake-fluid leaks require immediate attention because they can affect braking performance.

Step 15: Keep a DIY Maintenance Record

One of the easiest ways to become better at car maintenance is to keep a record.

Record:

  • Date of repair
  • Vehicle mileage
  • Work performed
  • Parts replaced
  • Fluid used
  • Symptoms noticed
  • Diagnostic codes
  • Next inspection date

A maintenance record helps you understand recurring problems and prevents important maintenance from being forgotten.

Repairs Beginners Should Avoid Without Proper Training

DIY does not mean every repair should be performed at home.

Beginners should be especially cautious with:

  • Airbag systems
  • Fuel-system repairs
  • High-voltage hybrid systems
  • EV battery systems
  • Major suspension work
  • Steering-system repairs
  • Internal engine repairs
  • Transmission rebuilding
  • Advanced electrical diagnostics
  • Major brake-system repairs
  • Repairs requiring vehicle lifting beyond available equipment

These systems can involve serious safety risks or require specialized tools and procedures.

How DIY Repair Can Save Money

DIY maintenance can reduce labor costs for simple jobs, but saving money should not be the only objective.

The real benefit comes from understanding what your vehicle needs.

For example, checking tyre pressure regularly may help prevent premature tyre wear. Replacing a dirty filter at the appropriate time can maintain proper airflow. Inspecting fluid levels can help you identify leaks before they become larger problems.

However, using cheap or incorrect parts can create additional costs later.

Always choose parts and fluids that meet the vehicle manufacturer’s requirements.

Common DIY Car Repair Mistakes

Beginners often make a few avoidable mistakes.

Using the Wrong Part

A part that looks similar may not be compatible with your vehicle.

Skipping the Owner’s Manual

The manual can contain important specifications, capacities and procedures.

Overtightening Fasteners

More force does not always mean better repair. Some components require a specific torque.

Ignoring Warning Signs

A warning light or unusual noise should not simply be ignored.

Working Without Proper Support

Never work underneath a vehicle that is supported only by a jack.

Guessing at Problems

Replacing parts randomly can become more expensive than proper diagnosis.

A Simple Beginner DIY Maintenance Routine

You do not need to repair everything at once.

A simple routine can include:

Weekly or Before Long Trips

  • Check tyres visually
  • Check for obvious fluid leaks
  • Confirm lights are working
  • Look for warning lights

Monthly

  • Check tyre pressure
  • Inspect wipers
  • Inspect accessible hoses and belts
  • Check engine oil according to the vehicle’s procedure

During Scheduled Maintenance

  • Replace filters when required
  • Inspect brakes
  • Check battery condition
  • Inspect suspension and steering components
  • Follow the manufacturer’s maintenance schedule

The exact maintenance Read also 2026-harley-davidson-cvo-road-glide-st-reviewintervals vary by vehicle, engine, driving conditions and manufacturer recommendations.

Final Thoughts

Learning basic DIY car repair is a practical skill that can make vehicle ownership easier and more affordable.

Start with simple jobs such as checking fluids, tyre pressure, filters, wipers, battery condition and basic diagnostics. As your experience grows, you can gradually learn more advanced maintenance procedures.

The most important rule is to know your limits. Saving money is useful, but safety should always come first.

Use the owner’s manual for vehicle-specific specifications, use the correct parts and tools, and never take shortcuts with critical systems such as brakes, steering, airbags, fuel systems or high-voltage components.

With patience, proper tools and careful procedures, beginners can learn many useful vehicle-maintenance skills and become more confident in taking care of their cars.


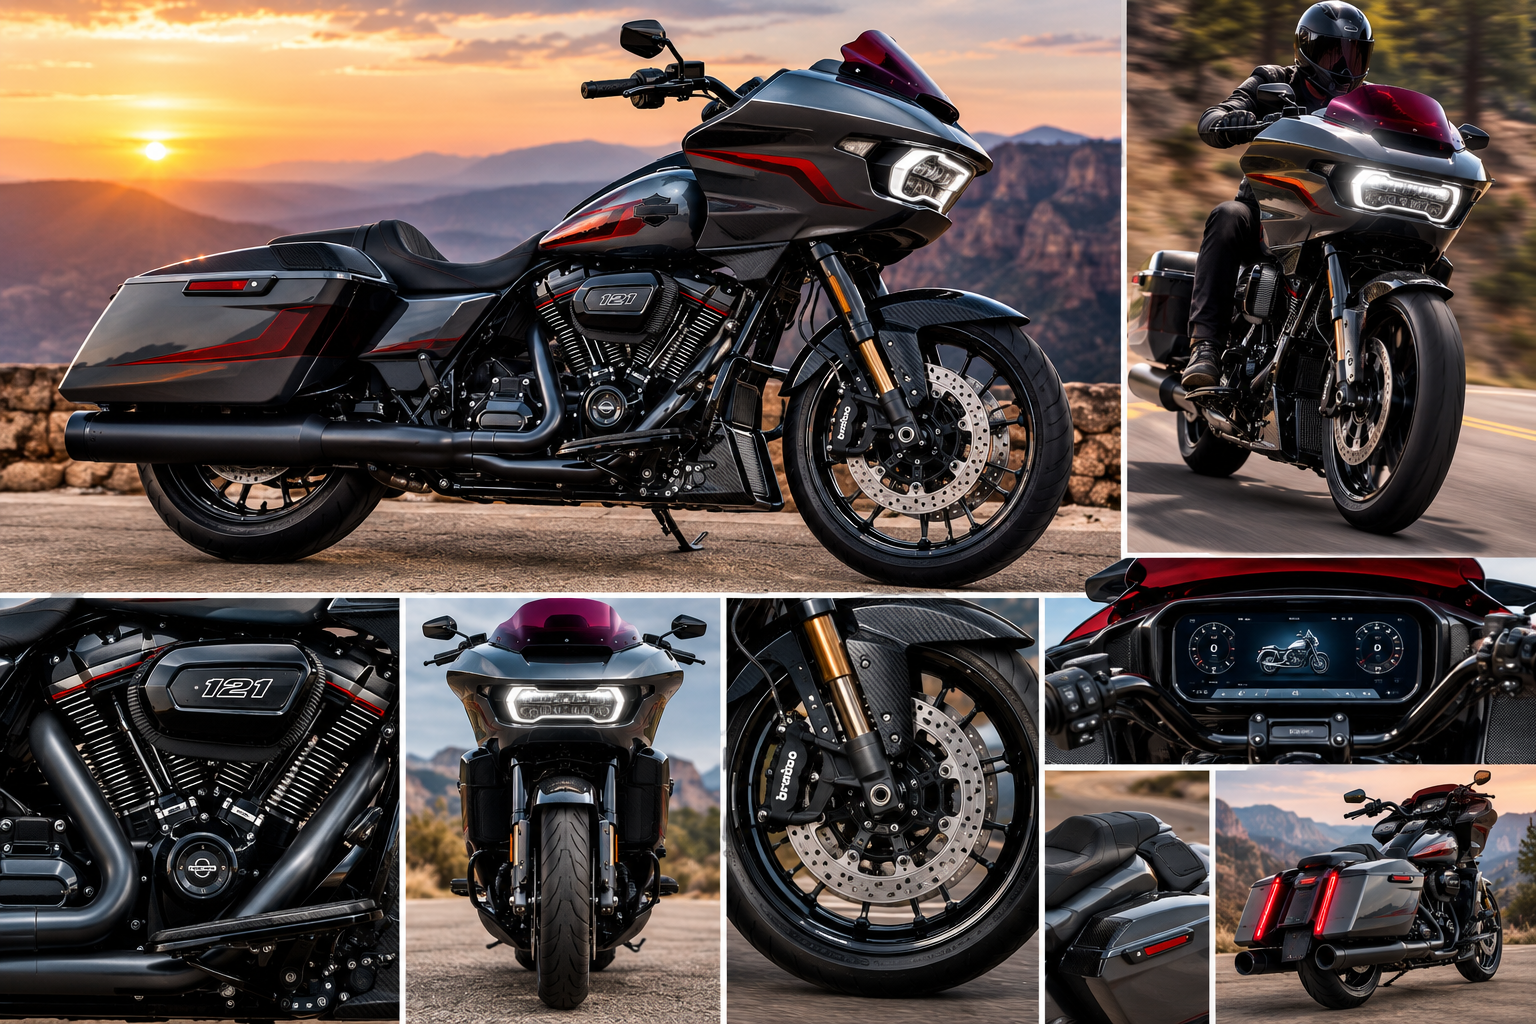
2026 Harley-Davidson CVO Road Glide ST Review: A Sharper CVO Bagger

file 00000000d4848208afaa9fae509047da

The 2026 Harley-Davidson CVO Road Glide ST takes the traditional American bagger formula and pushes it in a much more performance-focused direction. Instead of concentrating purely on long-distance touring comfort, Harley-Davidson has equipped the CVO Road Glide ST with a high-output Milwaukee-Eight 121 engine, adjustable suspension, aggressive rider ergonomics, premium braking hardware and selectable ride modes.

The result is a CVO bagger designed to bring more performance and sharper handling to the Road Glide platform.

A Performance-Focused Road Glide

The 2026 CVO Road Glide ST is powered by Harley-Davidson’s Milwaukee-Eight 121 High Output engine. In the U.S.-specification model, the engine produces a claimed 127 horsepower at 4,900 rpm and 145 lb-ft of torque at 4,000 rpm. The engine has a 121-cubic-inch displacement, an 11.4:1 compression ratio and electronic sequential port fuel injection.

Harley-Davidson has paired the engine with a Heavy Breather intake and performance-oriented exhaust hardware, giving the ST a more aggressive character than a conventional touring-focused Road Glide.

For riders who want the sound, torque and presence of a large American V-twin but also want a more sporting personality, this engine is one of the defining features of the motorcycle.

Sharper Chassis and Suspension

One of the biggest differences between the CVO Road Glide ST and a conventional touring bagger is its chassis setup.

The motorcycle features an inverted front fork with adjustable preload, compression damping and rebound damping. The rear suspension also provides adjustable preload, compression damping and rebound damping.

That level of adjustment gives riders more opportunity to tailor the motorcycle to their riding style, road conditions and load.

The ST also gets a more aggressive riding position, with a moto-style handlebar and six-inch risers. Harley-Davidson combines this setup with Switchback Collection components and seven-spoke cast-aluminum wheels to emphasize the motorcycle’s performance-oriented character.

Brembo Brakes and Performance Hardware

The CVO Road Glide ST is not simply a styling package.

At the front, Harley-Davidson fits dual four-piston radial-mounted calipers and dual floating wave-style rotors. The rear uses a single axial-mounted brake caliper and fixed rotor.

The braking hardware is important on a motorcycle weighing 838 pounds in running order in U.S. specification. The ST’s performance equipment is therefore designed around managing both its substantial mass and its higher-output engine.

Track and Track+ Ride Modes

The electronics are another major part of the CVO Road Glide ST’s identity.

Harley-Davidson offers eight selectable ride modes, including Road, Rain, Sport, Track, Track+ and three Custom settings.

The inclusion of Track and Track+ modes makes the ST unusual among large touring motorcycles. These modes allow the rider to alter the motorcycle’s electronic behavior for more performance-oriented riding.

The bike also incorporates rider-safety technologies including cornering ABS and traction-control functionality.

Aggressive Road Glide Styling

The familiar Road Glide Sharknose fairing remains one of the motorcycle’s most recognizable design elements, but the CVO Road Glide ST adds several performance-inspired details.

The front fender, tank console and rear seat cowl use forged carbon fiber, combining a distinctive appearance with weight-saving potential.

The motorcycle is offered in three exclusive colorways: Citrus Heat Re-Entry, Inferno Gray and Electric Coast. The Citrus Heat Re-Entry version receives a particularly aggressive graphic treatment across the fairing and tank.

A red-tinted windshield and Performance Red accents further emphasize the ST’s sporting personality.

Road Glide ST Dimensions and Specifications

The 2026 CVO Road Glide ST measures 94.9 inches in length, with a 64-inch wheelbase and a 26.7-inch laden seat height. Ground clearance is listed at 5.1 inches.

The motorcycle uses a 130/60B19 front tire and a 180/55B18 rear tire. Fuel capacity is 6 gallons, while luggage capacity is listed at 2.42 cubic feet.

For markets using metric specifications, Harley-Davidson’s APAC specification lists the engine at 1,977 cc, with 193 Nm of torque, a 22.7-liter fuel tank and a 380 kg running-order weight.

Skyline OS Technology

The CVO Road Glide ST is not all about mechanical performance.

The motorcycle comes with Harley-Davidson’s Skyline OS infotainment system and a 12.3-inch full-color TFT display. The system integrates the motorcycle’s digital gauges and infotainment functions into a large central display.

This gives the Road Glide ST a modern cockpit while retaining the physical presence and traditional styling expected from a CVO Harley-Davidson.

What Makes the CVO Road Glide ST Different?

The important point about the 2026 CVO Road Glide ST is that Harley-Davidson has not simply added cosmetic upgrades to a touring motorcycle.

The combination of the Milwaukee-Eight 121 High Output engine, adjustable suspension, radial front brakes, lightweight forged-carbon components, aggressive ergonomics and Track-oriented ride modes gives the motorcycle a distinct performance focus.Read also install-royal-enfield-clutch-plates

It remains a large bagger with substantial weight and touring capability, but its equipment is aimed at riders who want something more aggressive than a traditional Grand American Touring motorcycle.

Final Thoughts

The 2026 Harley-Davidson CVO Road Glide ST represents a sharper interpretation of the CVO bagger.

Its 121 High Output engine provides substantial performance, while the adjustable suspension and upgraded braking hardware address the chassis side of the equation. The forged-carbon components, moto-style handlebar and aggressive graphics reinforce the same message visually.

With Track and Track+ ride modes, Skyline OS technology and a premium CVO finish, the Road Glide ST combines Harley-Davidson’s traditional bagger identity with a much stronger performance emphasis.

For riders interested in a factory-built American touring motorcycle that places greater emphasis on performance and aggressive road riding, the 2026 CVO Road Glide ST is one of Harley-Davidson’s most performance-oriented Road Glide variants yet.

The Correct Factory-Standard Step-by-Step Method for Installing Royal Enfield Clutch Plates

file 00000000b650820882bf27ef5697abbf

Installing clutch plates  correctly is essential for smooth gear changes, proper clutch engagement, and reliable power transfer in a Royal Enfield motorcycle. A clutch that is assembled incorrectly can cause symptoms such as clutch slipping, dragging, difficult gear shifting, abnormal noise, or difficulty finding neutral.

The important point is that clutch plate installation is not simply a matter of removing the old plates and putting new ones in the same place. The friction plates, steel plates, clutch hub, pressure plate, springs, and related components must be inspected and assembled in the correct sequence.

This guide explains a practical, factory-standard approach to Royal Enfield clutch plate installation.

Why Correct Clutch Plate Installation Matters

The motorcycle clutch transfers engine power to the gearbox while also allowing the rider to disconnect the engine from the transmission during gear changes.

The clutch pack normally contains alternating friction and steel plates. When the clutch is engaged, the plates are pressed together. When the clutch is disengaged, the plates separate enough to interrupt power transmission.

Incorrect assembly can lead to:

  • Clutch slipping under acceleration
  • Clutch dragging when the lever is pulled
  • Difficult gear shifting
  • Difficulty finding neutral
  • Abnormal clutch noise
  • Poor clutch lever feel
  • Premature clutch wear
  • Inconsistent clutch engagement

For this reason, careful inspection and correct assembly are more important than simply replacing worn plates.

Tools and Preparation

Before starting the job, prepare the correct tools for the particular Royal Enfield model.

Typical requirements include:

  • Metric socket and spanner set
  • Torque wrench
  • Screwdrivers or suitable clutch-cover tools
  • Clutch holding tool where required
  • Clean drain container
  • Clean lint-free cloth
  • Suitable engine oil
  • Replacement clutch plates
  • New gasket or sealing component if required
  • Service manual for the exact motorcycle model

Keep the work area clean. Dirt or metal particles entering the clutch assembly can create problems after installation.

Important Safety Step

Place the motorcycle securely on a stable stand and allow the engine and oil to cool before beginning the repair.

Never work underneath or around a motorcycle that can fall unexpectedly.

Step 1: Confirm the Correct Clutch Plate Set

Before opening the clutch, confirm that the replacement clutch plates are designed for the exact Royal Enfield model and variant.

Royal Enfield motorcycles have been produced with different engine and clutch configurations over different generations.

Do not assume that clutch plates from one model will have the same:

  • Plate dimensions
  • Number of plates
  • Friction material
  • Steel plate design
  • Plate thickness
  • Installation sequence

Compare the replacement parts with the original components and the manufacturer’s service information.

Step 2: Drain the Engine Oil if Required

If the clutch cover or engine design requires oil removal, drain the engine oil into a suitable clean container.

Allow sufficient time for the oil to drain.

Inspect the drained oil for unusual metal particles or contamination. Excessive metallic debris may indicate a deeper mechanical problem that should be investigated before simply installing new clutch plates.

Replace the drain sealing washer if the service procedure calls for a new one.

Step 3: Remove the Clutch Cover Carefully

Remove the components required to access the clutch assembly.

Keep fasteners organized according to their location. Different bolts may have different lengths, and installing a bolt in the wrong location can damage components.

Separate the clutch cover carefully without damaging the sealing surfaces.

If a gasket is used, remove the old gasket material completely without scratching the mating surfaces.

Step 4: Inspect the Existing Clutch Assembly

Before removing the clutch pack, inspect the assembly carefully.

Look for:

  • Burn marks
  • Excessive friction material wear
  • Discolored steel plates
  • Grooves or notches in the clutch hub
  • Damage to the pressure plate
  • Weak or damaged springs
  • Excessive contamination
  • Abnormal wear on the clutch basket

Do not replace only the friction plates if another component is visibly damaged.

A worn clutch basket or hub can cause clutch engagement problems even after installing new plates.

Step 5: Remove the Clutch Springs and Pressure Plate

Remove the clutch spring fasteners gradually and evenly.

Do not completely loosen one spring while the other springs remain heavily loaded. Follow a cross-pattern or gradual-release method where applicable.

Remove the pressure plate carefully.

Before separating components, observe their orientation. If the pressure plate or related parts have a specific installation direction, that orientation must be maintained during reassembly.

Step 6: Remove the Old Clutch Plates

Remove the friction and steel plates one by one.

Keep the plates in order during removal if you need to compare the original arrangement with the manufacturer’s specified arrangement.

Some clutch assemblies can have specific plate arrangements or special plates, so never assume that every plate is identical.

Once removed, inspect the clutch hub and basket before installing the new components.

Step 7: Check the Steel Plates

The steel plates are just as important as the friction plates.

Inspect each steel plate for:

  • Warping
  • Blue or dark heat marks
  • Deep grooves
  • Excessive wear
  • Surface damage
  • Corrosion

A severely overheated or warped steel plate can prevent the clutch pack from operating correctly.

If the service manual specifies a flatness or thickness limit, measure the plate with appropriate tools and compare the result with the manufacturer’s limit.

Step 8: Prepare the New Friction Plates

Do not install dry friction plates unless the manufacturer’s procedure specifically permits it.

Before installation, pre-soak the new friction plates in the correct engine oil when required by the clutch manufacturer’s or Royal Enfield’s service procedure.

Use clean oil and allow the plates to become properly saturated.

This helps the friction material operate correctly during initial clutch engagement.

Avoid contaminating the friction surfaces with dirt, grease, or unsuitable lubricants.

Step 9: Install the Clutch Plates in the Correct Sequence

This is one of the most important steps.

Install the clutch plates exactly according to the service manual for the specific Royal Enfield model.

In a conventional clutch pack, friction and steel plates alternate. However, the exact number, order, and orientation can vary.

A typical arrangement may follow a pattern such as:

Friction plate → Steel plate → Friction plate → Steel plate

Continue the sequence until the specified clutch pack is complete.

However, do not use this pattern as a substitute for the model-specific service manual.

Some assemblies may include a special plate, different friction plate, or specific orientation.

Check the Plate Tabs

Make sure the friction plate tabs properly engage with the clutch basket.

The steel plates must correctly engage with the corresponding clutch hub or assembly surfaces.

Do not force a plate into position.

If a plate does not fit correctly, stop and identify the reason before continuing.

Step 10: Check Clutch Plate Movement

After installing the complete clutch pack, rotate the assembly by hand where practical and check that the plates are seated correctly.

The plates should sit evenly without being forced or tilted.

Check that:

  • The friction plates are properly seated
  • The steel plates are correctly positioned
  • No plate is trapped incorrectly
  • The clutch pack is aligned
  • The pressure plate can be installed correctly

If the clutch pack does not sit at the expected height, do not compensate by tightening the springs excessively.

Recheck the plate count and sequence.

Step 11: Install the Pressure Plate

Position the pressure plate correctly.

If the pressure plate has alignment marks, locating features, or a specified orientation, align it according to the service information.

Insert the clutch springs and fasteners.

Tighten the fasteners gradually and evenly.

Do not tighten one spring completely before installing or tightening the others.

Step 12: Tighten Fasteners to the Correct Torque

Correct torque is critical during clutch assembly.

Use a calibrated torque wrench and follow the Royal Enfield service specification for the exact model and component.

Do not guess torque values from another Royal Enfield model.

Over-tightening can damage threads or components, while insufficient tightening can allow fasteners to loosen during operation.

Where several clutch spring fasteners are used, tighten them evenly in the specified sequence.

Step 13: Reinstall the Clutch Cover

Clean the mating surfaces before reinstalling the clutch cover.

Install a new gasket or sealing component when specified.

Position the cover carefully and install the bolts in their correct locations.

Tighten the cover fasteners according to the manufacturer’s specified sequence and torque.

Avoid overtightening the cover bolts.

Step 14: Refill the Correct Engine Oil

Refill the engine with the correct oil and quantity specified for the particular Royal Enfield model.

Do not rely on a generic oil quantity because specifications can differ between models and engine generations.

Check the oil level using the manufacturer’s recommended procedure.

An incorrect oil level can affect engine and clutch operation.

Step 15: Adjust the Clutch Control

After assembly, inspect the clutch cable or hydraulic clutch system, depending on the motorcycle.

For a cable-operated clutch, check the manufacturer’s recommended free play at the clutch lever.

The lever should have the correct amount of free movement before the clutch mechanism begins to operate.

Too little free play can cause the clutch to remain partially disengaged and may contribute to slipping.

Too much free play can prevent complete clutch disengagement and may contribute to clutch drag.

Make the adjustment according to the exact Royal Enfield model specification.

Step 16: Perform a Static Check

Before riding the motorcycle, operate the clutch lever several times.

Check:

  • Lever movement
  • Clutch engagement feel
  • Abnormal noise
  • Oil leakage
  • Cable or hydraulic operation
  • Proper return of the lever

Start the engine and allow it to run for a short period.

Check the clutch operation again.

If there is unusual noise, significant vibration, oil leakage, or abnormal clutch behavior, stop the engine and inspect the assembly.

Step 17: Test the Clutch Carefully

After confirming that everything is functioning normally, perform a controlled test ride in a safe location.

Check whether:

  • The motorcycle moves smoothly from a stop
  • Gear changes are smooth
  • Neutral can be selected normally
  • The clutch fully disengages
  • The engine does not flare excessively during acceleration
  • There is no clutch slipping
  • There is no unusual clutch noise

Avoid aggressive acceleration during the initial test.

Give the new clutch components time to operate normally according to the manufacturer’s recommended procedure.

Common Mistakes to Avoid

Installing Plates in the Wrong Order

One of the most common mistakes is installing every plate without checking the specified sequence.

Always verify the exact arrangement for the model.

Installing Dry Friction Plates

If the manufacturer’s procedure requires oil pre-soaking, follow that procedure before installation.

Mixing Old and New Plates

Mixing worn friction plates with new components can produce inconsistent clutch performance.

Follow the manufacturer’s recommended replacement procedure.

Reusing Damaged Steel Plates

New friction plates cannot correct a severely warped or heat-damaged steel plate.

Inspect the complete clutch pack.

Over-Tightening Spring Bolts

Excessive torque can damage threads or clutch components.

Always use the specified torque.

Ignoring Clutch Free Play

Even a correctly assembled clutch can behave poorly if the control adjustment is incorrect.

Check clutch free play after assembly.

Using the Wrong Engine Oil

Motorcycle wet clutches depend on the correct oil specification.

Use the oil recommended for the exact Royal Enfield engine and service conditions.

Symptoms After Installation and What They May Indicate

Clutch Slipping

Possible causes include incorrect assembly, insufficient clutch spring pressure, contaminated friction plates, incorrect adjustment, or worn related components.

Clutch Dragging

Possible causes include incorrect plate arrangement, excessive clutch lever free play, warped steel plates, or a problem within the clutch release mechanism.

Difficult Gear Shifting

Check clutch adjustment, clutch release operation, oil specification, and correct plate installation.

Abnormal Noise

Recheck the clutch basket, hub, pressure plate, springs, and fasteners.

Do not continue riding if the noise suggests a serious mechanical fault.

Final Inspection Checklist

Before returning the motorcycle to regular use, verify:

  • Correct clutch plates were installed
  • Plate count is correct
  • Plate sequence is correct
  • Special plates are installed in the correct position
  • Friction plates were prepared according to the manufacturer’s procedure
  • Steel plates were inspected
  • Clutch springs are correctly installed
  • Fasteners were tightened to specification
  • Clutch cover is correctly sealed
  • Engine oil level is correct
  • Clutch free play is correctly adjusted
  • There are no oil leaks
  • Clutch operation is smooth
  • Gear selection works correctlyRead also/glamour-bike-full-engine-repairing-guide

Final Thoughts

Correct Royal Enfield clutch plate installation requires attention to the complete clutch assembly rather than just replacing the friction plates.

The most important principles are correct plate sequence, proper inspection, correct component orientation, even tightening, accurate torque, correct oil, and proper clutch adjustment.

Because Royal Enfield has produced multiple models and generations with different clutch configurations, always use the service information for the exact motorcycle when confirming plate count, installation orientation, torque values, oil specification, and clutch free play.

A careful installation procedure can help restore smooth clutch operation and reduce the possibility of premature clutch problems.

Rajesh Technical Giyan

Glamour Bike Full Engine Repairing: Restore Power and Extend Engine Life

image editor output image 1486034256 1789485760799439039639120003740

Excessive smoke, weak pickup, hard starting, engine noise, rising oil use, and poor mileage often lead riders to search for Glamour bike full engine repairing. These signs can point to internal wear, but they can also come from a blocked air filter, worn spark plug, poor tuning, or clutch trouble.

A full engine repair goes well beyond routine servicing. It may involve testing, engine removal, dismantling, machining, replacing worn parts, careful reassembly, and road testing. The final cost depends on the bike’s model year, internal damage, parts quality, workshop skill, and the amount of machining required.

Recognizing When a Glamour Bike Needs Full Engine Repairing

A complete rebuild should follow clear evidence of internal damage. One symptom alone does not prove that the engine needs to be opened.

Warning Signs of Internal Engine Damage

Blue or heavy exhaust smoke often points to oil entering the combustion chamber. Low power, hard starting, knocking, tapping, overheating, high oil use, and poor fuel mileage can also signal worn piston rings, a damaged piston, poor valve sealing, or crankshaft wear.

Record when each symptom appears. Cold starts, hard acceleration, high-speed riding, and engine braking can produce different clues. A single fault may not require a full rebuild, so avoid approving major work based on smoke or noise alone.

Problems That May Need Only Servicing

A dirty air filter, weak spark plug, carburetor fault, fuel-injection issue, weak battery, ignition fault, blocked exhaust, incorrect valve clearance, or clutch adjustment can imitate engine failure. These repairs cost less and should be checked first.

Ask for a written diagnosis before approving engine removal. It should state which tests confirmed internal wear, rather than using general phrases such as “engine problem” or “low pickup.”

Tests That Confirm the Repair

A technician may use compression testing, leak-down testing, oil inspection, valve-train checks, crankcase noise assessment, and smoke-pattern analysis. Metal particles in the oil can support a finding of internal wear, but they still need proper inspection.

Compression readings must match the exact Glamour model and engine version. Compare the results with the manufacturer service manual or ask a qualified technician to explain them before authorizing a rebuild.

What Glamour Bike Full Engine Repairing Includes

The repair may keep the motorcycle at a workshop for several days, especially when machining or extra parts are needed. A clear process helps you understand the labor charge.

Engine Removal and Complete Dismantling

The workshop disconnects fuel, wiring, exhaust, intake, clutch controls, and transmission-related parts before removing the engine. Each part should be labeled, cleaned, and checked to prevent incorrect reassembly.

Ask the workshop for photographs of damaged parts before replacement. Photos of worn rings, scored cylinder walls, damaged bearings, or burnt valves make the estimate easier to verify.

Cylinder, Piston, and Crankshaft Inspection

The technician checks the cylinder bore, piston, rings, connecting rod, crankshaft, bearings, and oil-sealing surfaces. Measurement decides whether a part can be reused, honed, machined, or replaced.

Visual inspection alone is not enough. Cylinder and piston sizes must match the exact Glamour engine version, or the repaired engine may suffer low compression, noise, oil use, or early wear.

Cylinder Head, Valves, and Camshaft Checks

The cylinder head, valves, valve seats, guides, camshaft, rocker arms, timing parts, and head gasket surface all need inspection. Poor valve sealing can cause low compression, hard starting, weak acceleration, and overheating.

Damaged gaskets and seals should be replaced during assembly. Reusing flattened or hardened sealing parts can cause oil leaks and repeat labor costs.

Choosing Parts for Glamour Bike Full Engine Repairing

Parts affect performance, service life, warranty support, and the value of the repair. Cheap parts can increase the chance of opening the engine again.

Genuine, OEM-Equivalent, and Aftermarket Parts

Genuine parts come through the motorcycle brand’s supply chain. OEM-equivalent parts meet similar design and size standards, while aftermarket parts vary widely in quality. No category is best for every repair, but critical parts need clear specifications and a trusted source.

Verify the part number, package, warranty, and model-year fit before purchase. Pay close attention to piston assemblies, bearings, oil seals, timing parts, and gasket kits.

Parts Commonly Replaced During Repair

Depending on measured wear, the job may need piston rings, a piston, gaskets, oil seals, bearings, clutch plates, valves, timing parts, and a spark plug. These parts should not be replaced from an automatic checklist.

A reusable-looking bearing, seal, or timing part may still have hidden wear. Ignoring it can force the workshop to open the engine again and charge labor twice.

Avoiding Incorrect or Poor-Quality Parts

Counterfeit, badly machined, or incorrectly sized parts can cause leaks, low compression, overheating, abnormal noise, and rapid wear. Incorrect clearances may damage the crankshaft or piston after only a short period.

Request an itemized parts list and keep purchase receipts. These records help with warranty claims and future service history.

Managing the Glamour Bike Full Engine Repairing Process

Good repair work depends on measurement, clean assembly, correct torque, and careful testing. A low quote has little value if the engine fails again.

Measurement and Pre-Assembly Checks

The workshop should measure cylinder wear, crankshaft condition, bearing clearances, valve condition, and gasket surfaces before closing the engine. Machining must follow service-manual limits, not guesswork.

Ask whether the technician records these measurements. Written clearance checks show that the engine was built to the correct limits.

Correct Reassembly and Torque

Clean assembly, correct gasket placement, fresh lubrication on moving parts, accurate timing alignment, and proper fastener torque all matter. Incorrect timing or tightening can cause leaks, poor power, internal damage, or complete failure.

Choose a workshop with torque tools and model-specific technical references. Hand-tightening critical fasteners is not a reliable repair method.

Start-Up and Post-Repair Testing

After assembly, the technician should check oil circulation, leaks, idle quality, engine noise, smoke, temperature, clutch action, gear changes, and charging performance. The first road test should be gradual, not a high-speed run under heavy load.

Get written instructions for the first inspection and oil change. Ask the workshop to record any remaining noise or oil seepage before delivery.

Glamour Bike Full Engine Repairing Cost, Time, and Warranty

A fixed price is difficult before dismantling because hidden damage may appear inside the engine. A proper estimate should separate labor, parts, machining, fluids, and extra work.

What Determines the Total Cost

Your bill may include diagnosis, engine removal, assembly labor, cylinder machining, replacement parts, oil, gaskets, clutch work, and electrical troubleshooting. Region, model year, parts source, and engine condition also affect the price.

Compare itemized estimates instead of choosing the lowest total. A higher quote may include better bearings, proper machining, new seals, and a longer warranty.

Questions to Ask Before Approval

Ask these questions before work begins:

  • What fault did the tests confirm?
  • Which parts need replacement, and which can be reused?
  • Is cylinder honing or other machining required?
  • How long will the repair take?
  • What break-in method and oil schedule should be followed?
  • Does extra work require approval first?
  • What parts and labor does the warranty cover?

Get the estimate, expected completion date, and warranty terms in writing. Ask what happens to the replaced parts after the repair.

Understanding Warranty Coverage

Warranty terms may differ for labor, genuine parts, aftermarket parts, machining, oil leaks, and damage caused by poor maintenance. Confirm the warranty period, exclusions, claim process, and required follow-up checks.

Keep invoices, part details, service records, and post-repair inspection notes. They can support a claim if a problem appears soon after delivery.

Running In and Maintaining a Repaired Glamour Engine

“Engine ripening” usually means engine running-in, also called engine break-in, after a rebuild. The correct method depends on the parts replaced and the machining performed.

Engine Break-In After Full Repair

Follow the repairer’s or manufacturer’s instructions. During the early period, avoid prolonged high-speed riding, heavy loads, harsh acceleration, and long operation at one engine speed when the technician advises against them.

Check the oil level, leaks, smoke, temperature, engine sound, clutch action, and gear shifting. Report sudden changes instead of waiting for the next service.

Early Inspection and Oil Service

The first inspection and oil change should follow the workshop’s schedule. The technician can check for metal particles, gasket leaks, loose fasteners, rising oil use, and changes in engine sound.

Record the mileage, oil grade, service date, and any symptoms after each early inspection. These notes can reveal a problem before it causes major damage.

Maintenance That Prevents Repeat Repairs

Use the correct oil grade and change it on schedule. Keep the air filter clean, inspect the spark plug, check valve clearance, maintain the chain, and follow the owner’s manual for lubrication and cooling checks.

Overloading, dirty fuel, skipped oil changes, and ignored warning signs speed up engine wear. Regular service costs far less than another full rebuild.Read also yamaha-r15-v4-step-by-step-service-guide

Conclusion

Successful Glamour bike full engine repairing starts with testing, not guesswork. Confirm internal damage through compression, leak-down, oil, valve, and noise checks before approving major work.

The repair should include measured inspection of the piston, cylinder, crankshaft, bearings, valves, and timing parts. Use correctly matched components, insist on an itemized estimate and written warranty, and follow clear break-in and oil-service instructions.

Choose a workshop that documents its measurements, assembly process, and final tests. Careful workmanship and disciplined maintenance give the repaired Glamour engine the best chance of delivering steady power for many more miles.

Yamaha R15 V4 Step-by-Step Service Guide

file 00000000c9c081fa9f8624f557eda75e

The Yamaha R15 V4 is a performance-oriented motorcycle that requires regular servicing to maintain smooth engine operation, reliable braking, proper handling, good fuel efficiency, and consistent performance. A proper service involves much more than changing engine oil. The engine, air intake, fuel system, chain drive, brakes, suspension, electrical system, tyres, and fasteners should all be inspected systematically.

This step-by-step guide explains a practical Yamaha R15 V4 servicing procedure and the important checks that should be performed during routine maintenance.

Important: Exact oil specifications, quantities, service intervals, torque values, valve clearances, and replacement procedures should always be confirmed from the service information for the specific R15 V4 model and year.

Tools and Materials Required

Before starting the service, prepare the necessary tools and consumables.

Common requirements include:

  • Socket and spanner set
  • Screwdrivers
  • Torque wrench
  • Oil drain pan
  • Funnel
  • Clean workshop cloth
  • Chain cleaning brush
  • Motorcycle chain cleaner
  • Suitable chain lubricant
  • Recommended engine oil
  • New oil filter, if applicable to the service
  • Replacement drain-plug washer, if specified
  • Air filter replacement, if required
  • Brake cleaner
  • Tyre-pressure gauge
  • Diagnostic equipment when required

For safety-critical work, use good-quality tools and the correct equipment rather than improvising.

Step 1: Wash and Inspect the Motorcycle

Start with a general inspection before removing components.

Clean the motorcycle carefully, particularly around:

  • Engine area
  • Chain and sprockets
  • Wheels
  • Brake components
  • Radiator area
  • Front and rear suspension

Avoid forcing high-pressure water directly into electrical connectors, bearings, switches, or other sensitive areas.

After cleaning, inspect the motorcycle for oil leaks, coolant leaks, damaged wiring, loose fasteners, cracked components, and other visible problems.

Step 2: Check the Engine Oil

Engine oil is one of the most important service items on the R15 V4.

Park the motorcycle securely on a level surface and follow the correct procedure for checking the oil level.

Look for:

  • Correct oil level
  • Unusual oil colour or contamination
  • Metallic particles
  • Oil leakage around the engine
  • Leakage around the drain area

Do not judge oil condition only by its colour. Oil level and service history are also important.

Step 3: Replace the Engine Oil

If an oil change is due, warm the engine according to the manufacturer’s procedure so the oil can drain effectively.

Then:

  1. Switch off the engine.
  2. Position a suitable drain pan under the engine.
  3. Remove the appropriate drain plug.
  4. Allow the old oil to drain completely.
  5. Inspect the drain plug and sealing washer.
  6. Replace the washer if required.
  7. Reinstall the drain plug using the specified torque.
  8. Add the recommended engine oil.
  9. Start the engine briefly according to the service procedure.
  10. Switch it off and allow the oil to settle.
  11. Recheck the oil level.
  12. Correct the level if necessary.

Never overfill the engine.

The correct oil grade and specification should be taken from the owner’s manual or service documentation for the specific motorcycle.

Step 4: Inspect or Replace the Oil Filter

If the service schedule calls for oil-filter replacement, replace it using the correct procedure.

Before installation:

  • Check the new filter is correct for the motorcycle.
  • Inspect the sealing surface.
  • Lubricate the filter seal where specified.
  • Install the filter correctly.
  • Tighten it to the manufacturer’s specification.

An incorrectly installed filter or damaged seal can cause an oil leak.

After starting the engine, inspect the filter area carefully for leakage.

Step 5: Inspect the Air Filter

The air filter controls the cleanliness of the air entering the engine.

Remove the air-filter element according to the manufacturer’s procedure and inspect it for:

  • Dust
  • Dirt
  • Oil contamination
  • Damage
  • Deformation
  • Improper sealing

A dirty or damaged filter can restrict airflow and affect engine performance.

If the filter is a replaceable type and is no longer serviceable, install the correct replacement element.

Do not install a damaged filter simply because it appears clean.

Step 6: Check the Spark Plug

The spark plug is another important engine-service item.

Remove the spark plug carefully using the correct tool.

Inspect the plug for:

  • Electrode wear
  • Carbon deposits
  • Abnormal colour
  • Oil contamination
  • Cracks
  • Damaged threads

Spark-plug condition can provide useful clues about combustion, but it should not be used alone to diagnose an engine problem.

Check the specified electrode gap and replacement interval for the particular R15 V4 version.

When installing the spark plug, avoid cross-threading and use the manufacturer’s specified tightening torque.

Step 7: Inspect the Cooling System

The R15 V4 uses a liquid-cooled engine, so the cooling system needs regular inspection.

Check:

  • Coolant level
  • Coolant leakage
  • Radiator condition
  • Coolant hoses
  • Hose clamps
  • Expansion reservoir
  • Radiator fins
  • Cooling fan operation

Remove dirt and debris from the radiator fins carefully without bending them.

Never open a hot cooling system because pressurized coolant can cause serious burns.

If coolant needs to be replaced, use the correct coolant and follow the manufacturer’s bleeding and filling procedure.

Step 8: Clean and Lubricate the Drive Chain

The drive chain is critical for transferring engine power to the rear wheel.

Place the motorcycle securely and inspect the chain.

Look for:

  • Excessive slack
  • Rust
  • Dry links
  • Stiff links
  • Damaged rollers
  • Uneven wear
  • Abnormal noise
  • Sprocket wear

Clean the chain using a motorcycle-safe chain cleaner and a suitable brush.

After cleaning and drying, apply an appropriate chain lubricant.

Do not simply spray lubricant over a heavily contaminated chain and consider it serviced.

Step 9: Check Chain Slack and Alignment

Correct chain slack is essential.

Measure the chain slack at the specified location using the procedure given by Yamaha for the particular model.

If adjustment is necessary:

  1. Loosen the required rear-axle hardware as specified.
  2. Adjust both sides evenly.
  3. Maintain correct wheel alignment.
  4. Recheck chain slack.
  5. Tighten the axle hardware to the specified torque.
  6. Recheck alignment and chain movement.

Incorrect alignment can cause premature chain and sprocket wear and can affect handling.

Step 10: Inspect the Front and Rear Sprockets

Inspect both sprockets for abnormal tooth wear.

A worn sprocket may show:

  • Hooked teeth
  • Sharp tooth edges
  • Uneven tooth profiles
  • Excessive wear

If the chain and sprockets are significantly worn, replacing only one component may not provide a satisfactory result.

Follow the manufacturer’s recommendations for replacing the drive-set components.

Step 11: Check the Braking System

The braking system should be treated as a safety-critical area.

Inspect:

  • Front brake pads
  • Rear brake pads
  • Brake discs
  • Brake fluid
  • Brake hoses
  • Brake lever
  • Brake pedal
  • Caliper area

Check the brake pads for remaining friction material and inspect the discs for abnormal scoring, cracks, overheating, or excessive wear.

If brake fluid is due for replacement, use the correct fluid specification and follow the proper bleeding procedure.

Never allow oil, chain lubricant, or grease to contaminate brake discs or pads.

Step 12: Check Brake Fluid

Inspect the brake-fluid reservoirs and check the fluid level.

Abnormally low brake fluid may indicate:

  • Pad wear
  • Leakage
  • Another brake-system problem

Do not simply add fluid without finding the reason for a significant level reduction.

Brake fluid absorbs moisture over time, so replacement should be performed according to the manufacturer’s service schedule.

Step 13: Inspect the Tyres

Check both tyres carefully.

Inspect for:

  • Correct inflation pressure
  • Tread wear
  • Uneven wear
  • Cracks
  • Cuts
  • Punctures
  • Bulges
  • Embedded objects

Use the recommended tyre pressure for the specific motorcycle and riding/load condition.

Do not rely only on visual inspection because a tyre can look normal while having incorrect pressure.

Step 14: Check the Wheels and Wheel Bearings

Spin the wheels where safe and appropriate and check for unusual noise or resistance.

Inspect:

  • Wheel bearing condition
  • Wheel play
  • Rim damage
  • Axle area
  • Tyre seating

Any abnormal wheel play should be investigated before the motorcycle is ridden.

Wheel-bearing replacement requires correct tools and installation technique. Force should never be applied through the wrong bearing race.

Step 15: Inspect the Front Fork

Check the front suspension for:

  • Oil leakage
  • Damaged fork seals
  • Scratches on fork tubes
  • Abnormal movement
  • Loose components

Clean the fork tubes and inspect them carefully.

Oil leaking from a fork seal can reduce suspension performance and may eventually create a safety problem if it reaches the brake components.

Step 16: Check the Rear Suspension

Inspect the rear shock absorber and linkage area for:

  • Oil leakage
  • Damage
  • Excessive play
  • Loose hardware
  • Abnormal movement

Suspension components should operate smoothly without unusual knocking or excessive free play.

Step 17: Inspect the Battery

Check the battery condition and terminals.

Look for:

  • Loose terminals
  • Corrosion
  • Damaged cables
  • Poor connections
  • Battery swelling or physical damage

If a battery charger or tester is used, use equipment appropriate for the motorcycle’s battery type.

A weak battery can cause starting and electrical-system problems even when the engine itself is healthy.

Step 18: Check the Electrical System

Turn on the ignition and check the major electrical functions.

Inspect:

  • Headlight
  • Tail light
  • Brake lights
  • Turn indicators
  • Horn
  • Instrument cluster
  • Starter operation
  • Switches
  • Warning indicators

Check wiring and connectors for damage or loose connections.

If a warning light remains illuminated, use suitable diagnostic equipment and the manufacturer’s service information rather than simply disconnecting the battery to clear the warning.

Step 19: Inspect the Fuel System

Check the fuel system for visible leaks or damage.

Inspect:

  • Fuel lines
  • Fuel connections
  • Tank area
  • Injector-related components
  • Throttle-body area

Do not attempt to open or disturb fuel-system components unnecessarily.

If fuel leakage is found, repair the problem before operating the motorcycle.

Step 20: Check the Clutch and Gear Operation

Check clutch operation with the engine off and then during a controlled test.

Look for:

  • Correct clutch free play
  • Smooth lever operation
  • Difficulty selecting gears
  • Clutch slipping
  • Unusual noises
  • Difficulty finding neutral

If the clutch is slipping or gear engagement is abnormal, further diagnosis may be necessary.

Do not compensate for a mechanical problem simply by making an excessive cable adjustment.

Step 21: Check the Throttle

The throttle should move smoothly and return properly when released.

Check:

  • Throttle free play
  • Cable or electronic throttle operation, depending on system
  • Smooth opening
  • Smooth closing
  • Return action

A throttle that sticks or fails to return correctly should be repaired before riding.

Step 22: Check Fasteners

A professional motorcycle service should include a visual inspection of important fasteners.

Pay particular attention to:

  • Brake components
  • Axles
  • Handlebar components
  • Foot controls
  • Exhaust mounting points
  • Engine mounting areas
  • Suspension components

Where a fastener is disturbed during service, use the specified torque rather than guessing.

Step 23: Start the Engine and Perform a Final Check

After completing the service, start the motorcycle and allow it to operate under safe conditions.

Check for:

  • Oil leaks
  • Coolant leaks
  • Abnormal engine noise
  • Warning lights
  • Unusual vibration
  • Exhaust abnormalities
  • Cooling-fan operation where applicable

Do not rev a cold engine aggressively.

Allow the engine to reach normal operating conditions according to the manufacturer’s recommendations.

Step 24: Perform a Controlled Road Test

A short, controlled road test can help verify the service.

Check:

  • Engine response
  • Clutch engagement
  • Gear shifting
  • Braking
  • Steering
  • Suspension
  • Chain noise
  • Tyre behaviour
  • Instrument warnings

Start slowly and confirm that the motorcycle behaves normally before returning to normal riding.

Common Yamaha R15 V4 Service Mistakes

Several mistakes can reduce the quality of a motorcycle service.

Overfilling Engine Oil

More oil does not mean better lubrication. Maintain the specified level.

Incorrect Chain Lubrication

Too much lubricant can attract dirt and contaminate surrounding components.

Ignoring Brake Pad Wear

Brake pads should never be judged only by whether the motorcycle still stops.

Using Incorrect Torque

Over-tightening can damage threads or components, while under-tightening can create dangerous looseness.

Ignoring Coolant Leaks

A small coolant leak can become a major overheating problem.

Cleaning Without Inspecting

Washing a motorcycle does not replace mechanical inspection.

Clearing Warning Lights Without Diagnosis

A warning indicator should be investigated rather than simply reset.

Yamaha R15 V4 Service Checklist

A practical service checklist can include:

  • Engine oil level and replacement
  • Oil filter inspection/replacement where applicable
  • Air filter inspection
  • Spark-plug inspection
  • Cooling-system inspection
  • Drive-chain cleaning and lubrication
  • Chain slack and alignment
  • Sprocket inspection
  • Brake pads and discs
  • Brake-fluid inspection
  • Tyre pressure and condition
  • Wheel bearings
  • Front fork
  • Rear suspension
  • Battery
  • Electrical system
  • Fuel system
  • Clutch operation
  • Throttle operation
  • Important fasteners
  • Diagnostic scan when required
  • Final road testRead also ev-battery-diagnostics-bms-testing

Final Thoughts

Proper Yamaha R15 V4 servicing is a systematic process rather than simply changing engine oil. Engine lubrication, air intake, cooling, chain drive, brakes, tyres, suspension, electrical components, battery, fuel system, and controls all contribute to the motorcycle’s performance and safety.

Following a structured inspection procedure helps identify small problems before they become expensive repairs. For exact service intervals, fluid specifications, torque values, valve-clearance measurements, and model-specific procedures, always use the official service information for the particular Yamaha R15 V4.

A careful service keeps the motorcycle reliable, responsive, and ready for everyday riding as well as demanding performance Rajesh technical Giyan

How to Diagnose EV Battery & Test BMS: Step-by-Step

file 000000009724820b8aa7b11fc4ba8d93

Electric Vehicle (EV) battery diagnostics is the process of checking the battery pack, individual cells, electrical connections, temperature sensors, insulation, voltage readings, and Battery Management System (BMS) to determine the actual condition of the battery.

The BMS is one of the most important electronic systems in an EV because it continuously monitors battery voltage, current, temperature, state of charge (SOC), and other operating parameters. When a battery-related fault occurs, proper diagnostics can help identify whether the problem is caused by a weak cell, sensor, wiring, communication issue, charging system, or the BMS itself.

Because EV battery packs can contain high-voltage electrical energy, diagnostic work should only be performed with the correct equipment, training, and manufacturer-approved safety procedures.

What Is EV Battery Diagnostics?

EV battery diagnostics involves measuring and analyzing different parameters of the high-voltage battery system.

A typical diagnostic process may include:

  • Battery pack voltage inspection
  • Individual cell or module voltage comparison
  • State of charge (SOC) analysis
  • State of health (SOH) evaluation
  • Battery temperature monitoring
  • Current measurement
  • Insulation resistance testing
  • BMS fault-code analysis
  • CAN communication diagnosis
  • Connector and wiring inspection
  • Charging and discharging performance evaluation

The objective is not simply to determine whether the battery works. A proper diagnostic procedure attempts to identify the specific reason for abnormal battery behavior.

Understanding the EV Battery Pack

An EV battery pack is normally made from multiple battery cells connected in series and parallel configurations.

Individual cells are grouped into modules, and multiple modules are combined to form the complete battery pack.

The battery system can therefore be viewed as:

Cell → Module → Battery Pack → BMS → Vehicle Control Systems

Depending on the vehicle design, the battery pack may also contain contactors, current sensors, temperature sensors, fuses, service disconnects, cooling components, and high-voltage connectors.

A problem in any of these components can affect vehicle performance.

What Is a Battery Management System (BMS)?

The Battery Management System is the electronic control system responsible for monitoring and managing the battery.

Its functions can include:

  • Monitoring cell voltages
  • Monitoring battery temperature
  • Measuring battery current
  • Calculating SOC
  • Estimating SOH
  • Detecting abnormal conditions
  • Controlling battery charging limits
  • Managing discharge limits
  • Controlling contactors
  • Protecting against overvoltage
  • Protecting against undervoltage
  • Protecting against excessive temperature
  • Communicating with other vehicle control modules

The exact BMS architecture varies between EV manufacturers and battery platforms.

Why BMS Testing Is Important

A battery pack can sometimes show a normal overall voltage while still having a problem with one or more cells.

For example, if most cells are operating within a similar voltage range but one cell group consistently behaves differently, the BMS may detect a cell imbalance or abnormal voltage condition.

BMS testing helps identify these differences.

It can also help determine whether a fault is related to:

  • Battery cells
  • Voltage sensing circuits
  • Temperature sensors
  • Current sensors
  • BMS communication
  • Wiring harnesses
  • Connectors
  • Contactors
  • Software or calibration
  • External charging systems

Important EV Battery Parameters

1. Cell Voltage

Cell voltage is one of the most important diagnostic parameters.

The BMS normally monitors individual cell groups or modules. During diagnosis, technicians compare the readings rather than relying only on total battery voltage.

A significant difference between cell-group readings may indicate:

  • Cell imbalance
  • A weak cell group
  • High internal resistance
  • Connection resistance
  • Measurement circuit problems

The acceptable voltage range depends on the battery chemistry, state of charge, temperature, and manufacturer specifications.

2. Battery Pack Voltage

Total pack voltage is measured by combining the voltage of the connected cell groups.

A diagnostic scan tool may display pack voltage electronically through the BMS.

If the measured voltage does not agree with the expected value, the cause may be related to the battery itself, voltage sensing, contactors, wiring, or measurement equipment.

3. State of Charge (SOC)

SOC represents the estimated amount of usable energy remaining in the battery.

It is similar to the fuel-level concept in a conventional vehicle, but the calculation is more complex.

The BMS can estimate SOC using information such as:

  • Battery current
  • Voltage
  • Temperature
  • Previous battery conditions
  • Charging and discharging history
  • Battery model calculations

SOC should not be interpreted as a direct measurement of battery health.

4. State of Health (SOH)

SOH provides an estimate of the battery’s remaining capacity or performance compared with its reference condition.

Battery aging can cause:

  • Reduced capacity
  • Increased internal resistance
  • Increased voltage variation under load
  • Reduced charging performance
  • Reduced driving range

SOH calculation methods differ between manufacturers and BMS designs.

Therefore, a scan-tool SOH value should be interpreted according to the vehicle manufacturer’s diagnostic procedures.

5. Battery Temperature

Temperature has a major effect on battery performance and safety.

The BMS monitors temperature sensors distributed throughout the battery system.

An abnormal temperature reading may indicate:

  • Sensor failure
  • Wiring problems
  • Cooling-system problems
  • Localized battery heating
  • Charging or operating conditions outside the expected range

Temperature readings should always be compared with the manufacturer’s specifications and with other sensors in the pack.

EV Battery Diagnostic Equipment

Professional EV diagnostics may require several types of equipment.

Diagnostic Scan Tool

A compatible diagnostic scanner can communicate with vehicle control modules and display:

  • BMS fault codes
  • Cell voltages
  • Battery temperatures
  • SOC
  • SOH
  • Pack current
  • Pack voltage
  • Contactor status
  • Charging-related parameters

A generic OBD scanner may not provide complete high-voltage battery information. Manufacturer-specific diagnostic equipment may be required.

Digital Multimeter

A suitable CAT-rated multimeter can be used for electrical measurements where permitted by the manufacturer’s service procedure.

The meter must be appropriate for the voltage category and measurement task.

Insulation Resistance Tester

An insulation tester can be used to evaluate electrical isolation between the high-voltage system and the vehicle chassis.

Insulation testing procedures vary by vehicle and battery architecture. Incorrect testing voltage or procedure can damage electronic components.

Current Measurement Equipment

Current sensors or appropriate measurement equipment can help evaluate battery charging and discharging behavior.

High-current measurements require equipment designed for the expected current and voltage.

Thermal Imaging Camera

A thermal camera can sometimes help identify abnormal heat patterns around:

  • Battery connections
  • Busbars
  • Contactors
  • Cables
  • Cooling components

Thermal inspection is an additional diagnostic method and does not replace electrical measurements or manufacturer procedures.

Step-by-Step EV Battery Diagnostic Process

Step 1: Follow High-Voltage Safety Procedures

Before any diagnostic work, identify the vehicle’s high-voltage system and follow the manufacturer’s shutdown and isolation procedure.

Do not assume that switching the vehicle off makes the battery system safe.

High-voltage batteries can retain dangerous energy even when the vehicle is not operating.

Use the required PPE, insulated tools, approved test equipment, and isolation procedures.

Step 2: Perform a Visual Inspection

Inspect the battery system for visible abnormalities.

Check for:

  • Damaged high-voltage cables
  • Corroded connectors
  • Loose connections
  • Physical battery damage
  • Signs of overheating
  • Coolant leakage
  • Water intrusion
  • Damaged wiring
  • Connector contamination

Do not continue testing if there is evidence of serious battery damage or another unsafe condition.

Step 3: Scan the BMS for Fault Codes

Connect the appropriate diagnostic tool and retrieve stored and active fault codes.

Do not immediately erase fault codes.

Record the codes and their associated data first.

Look for faults related to:

  • Cell voltage
  • Temperature
  • Insulation
  • Current sensing
  • Communication
  • Contactor operation
  • Charging
  • Battery management

The diagnostic code should be interpreted using the manufacturer’s service information.

Step 4: Check Cell Voltage Data

Review individual cell-group voltages through the diagnostic system if available.

Compare the readings under similar conditions.

A single abnormal reading does not automatically prove that the cell itself is defective. The sensing harness, connector, busbar, or BMS measurement circuit can also cause an abnormal reading.

Step 5: Compare Temperature Sensors

Review all available battery temperature readings.

Look for:

  • One sensor showing an unrealistic value
  • Significant temperature differences
  • Temperature increases during charging or load
  • Temperature-related BMS warnings

Sensor readings should be compared with ambient conditions and manufacturer specifications.

Step 6: Check Battery Current

Battery current information can help identify charging and discharging behavior.

Compare the BMS-reported current with the expected operating condition.

If the reading appears unrealistic, possible causes may include:

  • Current sensor problems
  • Wiring faults
  • Communication problems
  • BMS calculation issues

Step 7: Check BMS Communication

Modern EVs use communication networks such as CAN to exchange information between the BMS and other vehicle control modules.

Communication problems can produce symptoms such as:

  • Battery warning messages
  • Charging failure
  • Reduced power
  • Incorrect battery information
  • Vehicle not entering READY mode

A CAN-related fault does not necessarily mean that the BMS control unit itself is defective.

The wiring, connectors, power supply, ground, termination, or another control module may be responsible.

Step 8: Evaluate Insulation

High-voltage insulation is critical for vehicle safety.

The system must maintain adequate electrical isolation between high-voltage conductors and the vehicle chassis.

If an insulation fault is detected, possible causes can include:

  • Damaged cable insulation
  • Moisture
  • Coolant contamination
  • Battery casing problems
  • Component insulation failure
  • Charging-system faults

Use only the manufacturer’s specified test procedure because improper insulation testing can damage sensitive electronics.

Step 9: Check Contactors and Pre-Charge Operation

High-voltage battery packs commonly use contactors to connect and disconnect the battery from the vehicle’s high-voltage circuit.

A pre-charge circuit may also be used to control the initial charging of capacitors in the high-voltage system.

Faults in this area can cause:

  • No READY condition
  • Charging problems
  • High-voltage system shutdown
  • Contactor-related fault codes

Diagnosis should include the relevant BMS data and manufacturer test procedures.

How to Identify a Weak Battery Cell

A weak cell or cell group may not always be obvious when the battery is at rest.

A better diagnosis considers how the cell behaves during charging and discharging.

A potentially weak cell group may:

  • Drop in voltage faster under load
  • Reach the upper voltage limit earlier during charging
  • Show greater voltage deviation from other groups
  • Cause repeated BMS imbalance warnings
  • Contribute to reduced usable capacity

However, voltage variation alone is not enough to confirm a defective cell.

Battery temperature, SOC, current, internal resistance, and BMS calculations should also be considered.

Battery Cell Balancing

Cell balancing helps keep individual cell groups within an acceptable voltage relationship.

There are two common approaches:

Passive balancing: excess energy is dissipated as heat through balancing circuits.

Active balancing: energy can be transferred between cells or cell groups.

The actual balancing strategy depends on the BMS design.

If one cell group repeatedly becomes imbalanced, simply forcing a balance may not solve the underlying problem. The battery may have a degraded cell, increased resistance, or another electrical fault.

Common EV Battery and BMS Faults

Cell Voltage Imbalance

Possible causes include:

  • Cell aging
  • Capacity differences
  • High internal resistance
  • Poor connections
  • Cell sensing problems

Temperature Sensor Fault

Possible causes include:

  • Failed sensor
  • Damaged wiring
  • Connector problems
  • BMS input fault

Insulation Fault

Possible causes include:

  • Damaged insulation
  • Moisture
  • Coolant contamination
  • High-voltage component failure

BMS Communication Fault

Possible causes include:

  • CAN wiring problems
  • Poor connectors
  • Power supply issues
  • Ground problems
  • Network termination issues
  • Control-module failure

Charging Failure

Charging problems can originate from several systems, including:

  • BMS
  • On-board charger
  • Charging connector
  • High-voltage contactors
  • Temperature conditions
  • Battery protection logic
  • Communication between vehicle modules

A charging failure should therefore not automatically be blamed on the battery pack.

EV Battery Diagnostic Mistakes to Avoid

Several mistakes can create additional problems during EV diagnosis.

Do Not Measure High Voltage With Unsuitable Equipment

Always use equipment rated for the voltage and measurement category involved.

Do Not Ignore Isolation Procedures

A high-voltage battery must be treated as energized until the manufacturer’s isolation and verification procedure confirms otherwise.

Do Not Replace the BMS Without Diagnosis

Replacing an expensive BMS without proving that it is faulty can waste time and money.

Do Not Judge Battery Health From Pack Voltage Alone

A normal total voltage does not prove that every cell group is healthy.

Do Not Ignore Temperature Data

Temperature abnormalities can be an important clue to battery, cooling, sensor, or charging problems.

Battery Diagnostics During Charging

Charging is an important opportunity to observe battery behavior.

Depending on the vehicle and diagnostic equipment, technicians may monitor:

  • Charging current
  • Pack voltage
  • Cell voltage differences
  • Battery temperature
  • SOC
  • Charging power
  • Contactor status
  • BMS warnings

If one cell group behaves abnormally during charging, further diagnosis may be required.

Battery Diagnostics During Load

Battery behavior under load can reveal problems that may not appear during a static voltage check.

Under acceleration or another controlled load condition, a weak cell group may experience a larger voltage drop than healthier groups.

However, load testing on an EV must be performed according to the manufacturer’s procedure and appropriate safety requirements.

When Battery Replacement May Be Necessary

Battery replacement should not be the first conclusion after finding a battery-related fault.

Depending on the diagnosis, the repair may involve:

  • Wiring repair
  • Connector repair
  • Sensor replacement
  • Cooling-system repair
  • BMS-related repair
  • Cell or module replacement where supported
  • Contactor replacement
  • Charging-system repair

The battery pack may require replacement when the manufacturer determines that the pack or a major internal component has reached a condition where repair is not permitted or economically practical.

Importance of Manufacturer Service Information

EV battery systems are not identical.

Battery chemistry, voltage levels, BMS architecture, communication systems, cell configuration, cooling systems, diagnostic procedures, and allowable repair methods can differ substantially between vehicles.

For this reason, exact voltage limits, insulation limits, torque specifications, balancing procedures, isolation steps, and component replacement procedures should always come from the correct manufacturer service documentation.

EV Battery Diagnostics and Preventive Maintenance

Regular maintenance can help identify problems before they become severe.

Useful practices include:

  • Monitoring unusual charging behavior
  • Paying attention to battery warning messages
  • Keeping cooling systems maintained
  • Checking for physical damage
  • Inspecting charging equipment
  • Following recommended service intervals
  • Using appropriate diagnostic equipment when faults appear

Drivers should also avoid ignoring repeated battery warnings or unusual changes in charging performanceRead also how-to-change-bike-wheel-bearings

Conclusion

Electric Vehicle battery diagnostics and BMS testing require a systematic approach. Checking only the overall battery voltage is not enough to determine battery condition.

A proper diagnostic process evaluates cell-group voltage, temperature, current, SOC, SOH, insulation, BMS communication, contactors, charging behavior, and fault codes.

The most important principle is to diagnose the actual cause rather than replacing expensive battery components based only on symptoms.

Because EV battery packs operate at potentially hazardous high voltages, internal battery repair and high-voltage testing should be performed only by appropriately trained personnel using approved equipment and the vehicle manufacturer’s procedures.

Rajesh Technical Gyan